Quantcast
Channel: Qt 3D – Qt Blog

Qt 3D and Qt5 / Qt4 news and releases

$
0
0

Well its taken 3+ years for Qt 3D to be an overnight success, but here it is: we are now part of Qt5 and we’ll be front and centre in the exciting picture that will be powering a new generation of QML enhanced apps on a whole range of platforms. As a Qt5 Essential Qt 3D will be running on all those supported Qt5 platforms providing OpenGL accelerated 3D content defined in QML. Its great news for us in the team, and good news for those of you using Qt 3D or planning on using it for your projects.

If you’re a Qt 3D fan and have been following the project for a while you’ll know that as a labs project we had to do our own releases, carefully making sure that packages we created matched the current supported versions of Qt 4. We have in the past released easy-to-use packages for Symbian^3, N900 and the N9 platforms, as well as for Windows desktop; and supported Linux and Mac with source packages. We got great feedback from those package releases, and saw some interesting projects built on Qt 3D.

As part of Qt5 the SDK team and release program will make Qt 3D available through official Qt5 release activities. This will free us up to spend more time on performance, bug-fixing and best of all the features that we’ve been asked for. This is fantastic news for us since packaging consumed quite a bit of our resources, and now we can focus that on improving Qt 3D.

Before we move away from Labs status we are making one more Qt 3D labs release: and this is it. This follows our Qt 3D TP1 and TP2 releases with a 1.0 release as part of our Qt 4.x programme. In this release are a number of important bug fixes, some new stuff like threaded texture and model loading, and the new Qt 3D Asset Viewer, which allows you to visually configure the models you load into your Qt 3D applications.

Today we announce our Qt 3D 1.0 for Qt 4.8.1 with only a small amount of fanfare: this will be our last 4.x major version release.

For Windows folks, you’ll need the Qt 4.8.1 Windows MSVC release which is available from the Qt downloads page.

The documentation is also available on-line on the Qt project site.

For N9 developers we no longer create a package. The publicly available Qt SDK can build these packages for you from our source download using the Qt 4.7.x Harmattan support, that is built right in to your SDK. Just follow the special N9 instructions in our build documentation. For Symbian likewise you will need to create your own packages. For folks using a MinGW based Qt on Windows, you will need to use the source package also.

Why are we not supplying N9 or Symbian packages for Qt 3D 1.0 against Qt 4.x? Since Qt 3D 1.0 for 4.x is a labs project, our previous device packages were not official Nokia system packages, and just functioned as a convenience to the developer. This is why we’re asking that you create your own packages to underscore the fact that Nokia does not supply Qt 3D system packages as part of Qt 4.x, and you’ll need to do your own work to include any Qt 3D functionality in your device apps. Apologies for this, but its the way it is for our 4.x labs status programme. Qt 3D team remains available on IRC and via our email lists (see below) to support you as far as possible when including Qt 3D in your apps, but unfortunately for Qt 4.x we cannot supply Nokia system packages for these platforms.

What about Qt5? That is where the excitement lies, with a vastly improved QML rendering engine, which has the benefit for Qt 3D of guaranteed OpenGL support. If you have QML2 then you have OpenGL and that means Qt 3D is ready to go on any Qt5 platform. We’d love you to try out Qt 3D on Qt5 – go and check out the Qt5 Alpha release which has just been announced, and tell us what you think. If you want to try out the bleeding edge, you can also get Qt 3D in Qt5 by building from Git.

The post Qt 3D and Qt5 / Qt4 news and releases appeared first on Qt Blog.


Blog on Qt 3D 2.0 from KDAB

$
0
0

Sean Harmer of KDAB has written an excellent two part blog entry on the upcoming Qt 3D 2.0. In the first part he goes in to what a modern 3D engine should be able to do and then goes on to explain the high level architecture and principles of Qt 3D 2.0. In the second part he shows some examples and gives an update on the current status of Qt 3D 2.0. Go and read both, they are very informative and give a glimpse to what’s coming in 3D side of things to Qt.

The post Blog on Qt 3D 2.0 from KDAB appeared first on Qt Blog.

Qt 5.5 Beta Released

$
0
0

It’s my pleasure to announce the release of the Qt 5.5 Beta today.

Since we released Qt 5.4, a lot of effort has been put into fixing bugs reported both by our customers and the community. With this in focus, we went through a couple weeks of dedicated bug fixing here at The Qt Company. During this time, we worked 100% on fixing as many open issues as possible. Although the focus of Qt 5.5 has been on stability and performance, it also has some interesting new features and functionality to offer.

3D and OpenGL Features

While Qt has had OpenGL integration and support for many years, the integration was mainly about low level enablers and classes. With Qt 5.5, we are now adding two new modules, that greatly extend our set of 3D APIs: Qt Canvas 3D and Qt 3D.

The first module that makes using 3D easier in Qt is Qt Canvas3D. The module first appeared as a Technology Preview in Qt 5.4, but is now fully supported in Qt 5.5. It provides a WebGL-like API that can be easily implemented using Qt Quick, which greatly simplifies 3D content integration. WebGL itself is a low level API, but Qt Canvas3D can be used in conjunction with JavaScript frameworks such as three.js making loading and displaying 3D content trivial.

Another major new feature, available as a Technology Preview, is the new Qt 3D module. Qt 3D is a module that existed during Qt 4 times, but was never added to Qt 5…yet. Thanks to our partner KDAB, it has now undergone a major refactoring and is an even better solution than the Qt 4 version.

Qt 3D takes our 3D support a good step upwards making it a lot easier to use and integrate 3D content into Qt applications. The module provides both C++ and QML APIs. For more details what Qt 3D 2.0 brings, you can check Qt 3D documentation and KDAB’s series of blogs. Being a Technology Preview, the module still has some rough edges. Please let us know what you think, so that we can turn Qt 3D into a fully supported part of Qt with Qt 5.6.

Qt Quick and Multimedia related news

A good amount of work has gone into improving the QML engine, which is the basis for Qt Quick. Apart from many bug fixes and performance improvements, it now supports JavaScript typed arrays and a new method to interface with your own value based classes.

Enterprise Controls have been folded into the base Qt Quick Controls and are also made available in the Community version. We also added a TreeView control to complete the set of controls required for building desktop applications.

A lot of work has also been put into Qt Multimedia. On Linux, we now use gstreamer 1.0 as the default backend and lots of bugs have been fixed for the other platforms. The new Video filtering framework is a great new feature that allows the integration of frameworks, such as OpenCL or CUDA with VideoOutput elements.

Qt WebEngine and WebView

Qt WebEngine has been updated to Chromium version 40 and has received new APIs for managing downloading of files, controlling cache and cookies, as well as settings. Support for Qt WebChannel is now built-in and many experimental APIs are now public and fully supported.

The Qt WebView module has some new APIs and now also supports Mac OS X in addition to Android and iOS.

Qt Location

Qt Location is another module that has made its way from Qt 4 to Qt 5 as a Technology Preview. Your feedback on this will be important to make this module an integral part of the Qt 5.6 release. Qt Location adds mapping, geocoding, routing and places support to Qt. In conjunction with the existing Qt Positioning API, it should give you all you need to create location aware applications. Qt Location can make use of different mapping providers, such as Nokia Here, Mapbox and Openstreetmap currently.

Other Improvements

Many other things have been improved with Qt 5.5, you can find description of all the new features on our wiki. For example, we now support more platforms for Bluetooth LE and there is a new SSL backend based on Secure Transport for Mac OS X and iOS.

We have also updated the supported platform and compiler configurations. On Linux we are now supporting RedHat Enterprise Linux better than before, and the binaries can also be directly used on RHEL as well as many other Linux distributions. For Mac users OS X versions 10.8, 10.9 and 10.10 are supported by Qt 5.5. We are not yet officially supporting Windows 10, as it has not been released, but we have been using the pre-releases in development and will add support to Windows 10 with Qt 5.5.x patch release after it is available.

Deprecated Modules

With all these new features coming, some older ones are being deprecated, namely Qt WebKit, Qt Script, and Qt Declarative (Qt Quick 1). All of these modules are still available with Qt 5.5, but we strongly recommend using their replacements for any new functionality: Qt WebEngine, Qt Quick, and Qt QML, which also provides a fully compliant JavaScript engine. While there are still some smaller feature gaps in a few places between these modules, we believe that the replacements are now better than the deprecated modules. We will of course continue to improve the new modules and will try to fill any remaining feature gaps from the old ones.

You can download the Qt 5.5 Beta from your Qt Account portal or via download.qt.io. Please try them out and report back to us any issues you might find, so that we can make Qt 5.5 as awesome as possible.

The post Qt 5.5 Beta Released appeared first on Qt Blog.

Qt3D 2.0 Technology Preview

$
0
0

This blog post is written by a guest blogger, the maintainer of Qt3D module and the Managing Director KDAB UK Ltd, Dr Sean Harmer.

KDAB is pleased to announce that the Qt 5.5.0 release includes a Technology Preview of the Qt3D module. Qt3D provides a high-level framework to allow developers to easily add 3D content to Qt applications using either QML or C++ APIs. The Qt3D module is released with the Technology Preview status. This means that Qt3D will continue to see improvements across the API design, supported features and performance before release. It is provided to start collecting feedback from users and to give a taste of what is coming with Qt3D in the future. Please grab a copy of the Qt 5.5.0 release and give Qt3D a test drive and report bugs and feature requests.

Qt3D provides a lot of functionality needed for modern 3D rendering backed by the performance of OpenGL across the platforms supported by Qt with the exception of iOS. There is work under way to support Qt3D on iOS and we expect this to be available very shortly. Qt3D allows developers to not only show 3D content easily but also to totally customise the appearance of objects by using the built in materials or by providing custom GLSL shaders. Moreover, Qt3D allows control over how the scene is rendered in a data-driven manner. This allows rapid prototyping of new or custom rendering algorithms. Integration of Qt3D and Qt Quick 2 content is enabled by the Scene3D Qt Quick item. Features currently supported by the Qt3D Technology Preview are:

  • A flexible and extensible Entity Component System with a highly threaded and scalable architecture
  • Loading of custom geometry (using built in OBJ parser or assimp if available)
  • Comprehensive material, effect, render pass system to customise appearance
  • Data-driven renderer configuration – change how your scene is rendered without touching C++
  • Support for many rendering techniques – forward, deferred, early z-fill, shadow mapping etc.
  • Support for all GLSL shader stages (excluding compute at present)
  • Good support for textures and render targets including high-dynamic range
  • Support for uniform buffer objects where available
  • Out of the box support for simple geometric primitives and materials
  • Keyboard input and simple camera mouse control
  • Integration with Qt Quick 2 user interfaces

Beyond rendering, Qt3D also provides a framework for adding additional functionality in the future for areas such as:

  • Physics simulation
  • Skeletal and morph target animation
  • 3D positional audio
  • Stereoscopic rendering
  • Artificial intelligence
  • Advanced input mechanisms

To learn more about the architecture and features of Qt3D, please read KDAB’s series of blogs and the Qt3D documentation.

KDAB and The Qt Company will continue to improve Qt3D over the coming months to improve support for more platforms, input handling and picking, import of additional 3D formats, instanced rendering, more materials and better integration points to the rest of Qt. If you wish to contribute either with code, examples, documentation or time then please contact us on the #qt-3d channel on freenode IRC or via the mailing lists.

The post Qt3D 2.0 Technology Preview appeared first on Qt Blog.

Qt 3D: The Asset Conditioning Pipeline

$
0
0

Qt 3D development has been coming along nicely and is scheduled to be released with Qt 5.7.  One of the issues we face with offering a high-level 3D rendering API is facilitating the asset conditioning pipeline.  When dealing with 3D assets, there is a need to process the assets created in digital content creation applications like Maya, 3ds Max, or Blender into a format that makes sense for the rendering engine.  This is analogous to 2D asset conditioning pipeline where a designer creates an image in Adobe Illustrator (an .ai file), and before you use it in your application you convert it to PNG format.

What is an Asset Conditioning Pipeline?

Before diving into the implementation details of Qt 3D its worth explaining what an asset conditioning pipeline is.  Assets created in digital content creation applications are typically stored in data formats that reflect the needs and capabilities of that tool, and not the application you intend to use them.  The saved file will likely contain an abundance of extra data that is not relevant to your application leading to a larger storage need, as well as more time to load and put into use at runtime.  As an example, if we look at the data stored in a Blender file (.blend) in addition to containing geometry data, there is information specific to the Blender editor and renderer.  Information like the layouts of the editor, undo stack, modifiers, levels of detail etc.  There is also other really expensive things like high polygon models that are sculpted and used for baking additional assets like normal maps.  So even for a very simple model the file saved by the editor could have much unnecessary data that just takes up space in your deployment bundle, and in some cases the data it has is not in the most efficient format for how we will use it.

Many 3D content creation tools have the capability to export into file interchange formats like COLLADA.  These exporters are useful in the sense that they can strip out much of the excess data that is tool specific.  But while formats like COLLADA makes it easier to transfer 3D assets between content creation tools, they still don’t store data in a format facilitating efficient loading and usage. In addition, getting assets in the desired format is just not always possible. For instance, receiving a 40 MB car model in OBJ format from the design department is less than ideal, to put it mildly, but sometimes unavoidable in practice. It would be nice if developers could progress with the project regardless, without having to deal with asset loading times of several minutes.

Given those issues, the asset conditioning pipeline is responsible for transforming that asset file into a format that is useful for that intended task.  So stripping the asset of unnecessary data, and converting what is left to a format that can be easily and efficiently used by the rendering engine.

How does Qt 3D facilitate the asset conditioning pipeline?

Qt 3D is quite flexible in what assets can be used at runtime.  It is now possible to use any of the above formats directly in your application at runtime, despite the inefficiency. This is enabled by use of the Open Asset Import Library (libassimp).  We bundle this as a 3rd party library with the Qt 3D module and provide a scene parser plugin that uses it to load a Qt 3D scene from an asset file.  This approach can be seen as using non-conditioned assets, or runtime conditioned assets, and will not be ideal for resource sensitive applications, especially on mobile and embedded platforms.

In addition to the Assimp scene parser plugin, we also have a plugin for loading GL Transmission Format (glTF) assets.  The glTF format like the COLLADA format is a Khronos-defined (draft) standard, but unlike COLLADA, glTF is designed for the efficient transmission and loading of 3D scenes and models for applications.  Assets bundled as glTF have geometry data, textures, and shaders all bundled in such a way that it is easy for Qt 3D to upload those assets to the GPU, and make use of them in the Qt 3D scene.  Because of this we choose glTF as the format to use for our asset conditioning tool.

Introducing qgltf

To get a quick overview, you may want to watch the recording of the lightning talk from Qt World Summit 2015 in Berlin:

The Qt tool qgltf is an application that is bundled with the Qt 3D module.  It is a host tool in the same way as qmake or moc, in that is built and run on the host machine.  The purpose of qgltf is to take an arbitrary 3D asset created with a digital content creation tool, and convert to glTF which will be loaded into a Qt 3D scene by the above mentioned glTF scene parser plugin.  By using the bundled Open Asset Importer Library in the qgltf tool, we are able to convert the same files Assimp scene parser can load into glTF for efficient loading. This also means that the number of dependencies for the Qt libraries on the target system can be reduced. This can be important for embedded systems in particular: there is no need to ship potentially large 3rd party libraries together with Qt when the assets are baked into a common, efficient format during build time.   

There are existing converter tools (for example COLLADA2GLTF) available that can convert 3D assets to glTF, and in some cases the output of these will be usable as-is by the Qt 3D’s glTF scene parser plugin.  However, besides the obvious issue of COLLADA not being the only commonly used format, glTF’s focus is on WebGL at the moment.  In Qt 3D we have support for all current OpenGL and OpenGL ES versions, which means that shaders for a given GLSL version built into the assets can be problematic. More importantly, it will often be desirable to use Qt 3D’s built-in materials instead of providing custom shaders (generated by the converter tool) for every asset. This way models and scenes can participate in Qt 3D’s standard lighting system. Therefore, in addition to a set of basic built-in shaders, qgltf promotes the use of extensions like KHR_materials_common which allow models to use Qt 3D’s own standard materials instead of asset-provided shaders and technique descriptions.

By using the qgltf tool we also have the possibility to bring further optimizations to the generated files.  Assets in glTF typically consist of several different standalone files.  The main asset file is the .gltf file which is a JSON file can that actually describes the scene itself.  With qgltf we can output this as a binary JSON file, or even a compressed version of that to get even more efficient loading times.  Generating tangent vectors and scaling vertices during build time are also supported. In case Qt 3D’s built-in materials are not deemed suitable, qgltf can generate techniques and shaders both for GLSL 1.00 and version 150 (suitable for OpenGL 3.2+ core profile contexts). Another experimental feature qgltf can provide is automatic compression of texture assets.  So if you have several texture files that are in PNG format, and you are deploying to a device that supports ETC1 compressed images, qgltf will make sure the asset it generates also contains and uses those compressed textures.

It is also important to point out that not every possible feature of glTF is in use: things that are better defined through Qt’s, QML’s and Qt 3D’s own powerful facilities are left out from the baked assets. This includes lights and animations (skeletal animations are on the roadmap for future releases, though). So in short, the tool’s focus is on converting and baking the parts of the assets that matter, nothing more, nothing less, into a format that is most efficient to deploy and load at runtime, even on I/O-bound embedded systems.

Usage of qgltf

Keeping with our tradition of flexibility, you also have a few options on how you can use the qgltf tool to best fit your workflow.  First can use it as a standalone command line tool that you can include in your existing asset import pipeline.  If you have the Qt 3D module installed alongside your Qt installation the qgltf tool exists at the same path as the other Qt tools (qmake, moc, uic).  If you are using qmake as your build system you also have the possibility to have qgltf run automatically when your application builds.  To do this you simply need to list your 3D model assets as followed in one of your qmake project files:

# 3D assets
QT3D_MODELS += assets/3d/car.obj
# Parameters for qgltf (use binary JSON and rely on Qt 3D's built-in materials)
QGLTF_PARAMS = -b -S
# load the qgltf qmake feature
load(qgltf)

This will convert the OBJ file into a glTF format file, and add it to a Qt resource file (.qrc) together with all the geometry and image files.  To make use of that model in your Qt 3D application you just need to load the generated file by setting it as the source in your SceneLoader. Everything else is managed automatically by the build system.

SceneLoader {
    source: “qrc:/models/car.qgltf”
}

What does the future hold?

Qt 3D is still quite new and under heavy development so there are still many possibilities that can be explored with regards to asset conditioning and other tooling.  We could for example have additional measures in qgltf that optimize the original mesh when possible.  We have also been looking into the possibility of generating a QML file along with the glTF asset that can facilitate the loading and easy access of elements (sub-meshes, materials, etc.) within the models and the scene.  And of course if you have any feedback or ideas we would love to hear them.

The post Qt 3D: The Asset Conditioning Pipeline appeared first on Qt Blog.

Using Qt 3D to visualize music

$
0
0

As the development of the Qt 3D module is proceeding we wanted to give it a try and test how one could visualize music using the module. The result of this experiment was a new example, Audio Visualizer Example, to the Qt 3D module.

The example shows how you can use Qt 3D rendering with Qt Quick elements. The 3D content is rendered using the Scene3D type. The bars are objects in NodeInstantiator and they are animated to visualize the magnitude of the music played. On top of the scene we’ve placed buttons to pause/play and to stop the music. These buttons are Qt Quick elements. The music is played using MediaPlayer provided with Qt Multimedia module.

In the example there’s a curve shaped 3D entity to show the progress based on the duration of the played track. There’s also a prism 3D entity to show the title of the example and the song. The prism shows the title of the song while the song is played and the title of the example becomes visible when the playing is stopped. The titles are placed on different edges of the prism and the angle of the prism is animated once the title needs to be changed.

If you want to give the example a try you can find it from codereview.qt-project.org under examples\qt3d\audio-visualizer-qml. We are aware that there are still some improvements that could be made to the backend performance to make the animation of the bars smoother, but as Qt 3D is Technology Preview in the upcoming Qt 5.6 release these improvements are more than likely.

This example was created to give some ideas of what you can achieve using Qt 3D. We hope you like it!

The post Using Qt 3D to visualize music appeared first on Qt Blog.

Introducing Qt 3D

$
0
0

Introducing Qt 3D

One of the major new features in Qt 5.7.0 is the fully supported release of a stable Qt 3D module! Although Qt has long offered facilities for taking advantage of accelerated graphics and integrating custom OpenGL rendering in Qt-based applications, it has not provided a high-level facility for 3D graphics. Qt 3D now provides this and paves the way for making 3D content a first class citizen in Qt applications.

Qt 3D allows you to quickly and easily build, render and interact with 3D scenes using either C++ or QML APIs. We also provide a custom Qt Quick 2 element called Scene3D that allows you to trivially embed Qt 3D content into a Qt Quick 2 based UI. This allows for the composition of 2D and 3D content to create visually stunning user interfaces for a wide range of domains including automotive IVI, medical, and other visualisations.

Features of Qt 3D

Based on the experience and lessons learned at KDAB helping many of our customers integrate 3D content into their applications Qt 3D has been architected to be more than just a 3D renderer. Qt 3D is a framework for soft realtime simulations – although rendering is still a very important part of this. What does this mean in practice? Well, it means that if Qt 3D doesn’t quite fit your needs, then you can freely extend it to support your use cases. Unlike traditional OOP, Qt 3D is built upon an Entity Component System (ECS) which favours aggregation over deep and wide inheritance hierarchies (see this Overview of Qt 3D for more information).

The ECS architecture also provides a way for us to continue to develop Qt 3D in the future without having to make restrictive assumptions now. As an example, support for collision detection and rigid-body physics simulations can be added in without impacting the renderer at all. We have taken care to ensure that the core architecture of Qt 3D as well as the renderer are as generic as possible.

The Qt3DCore library provides the basic infrastructure that the rest of Qt 3D builds upon. It is a lightweight library but provides a very scalable framework that takes advantage of today’s and tomorrow’s many core hardware. If you create your own aspects for Qt 3D, the core provides you with a very nice task-based threading framework to allow your jobs to be distributed across a thread pool with dependencies between jobs taken care of. Qt 3D’s architecture keeps the main thread as free of heavy work as possible by shifting such work to the thread pool. The Qt3DCore library makes it easy to communicate between the frontend and backend objects.

The Qt3DRender module is a high-level interface to hardware accelerated graphics. At present Qt 3D uses an OpenGL backend but we have left the door open to be able to support more modern APIs such as Vulkan, Metal and DirectX 12 in the future. Qt 3D already supports the vast majority of the OpenGL feature set including compressed textures, instanced rendering, and all shader stages – yes, you can now use OpenGL compute shaders with Qt 3D!

One of the key features of Qt 3D’s renderer is the frame graph concept. The frame graph is a way to specify how a 3D scene is rendered. Traditionally this would be hard-coded in low-level C++ code that implements logic around which groups objects are rendered, in what order, using which specific cameras, what the current render target is etc. We wanted to avoid users having to provide such low level code in order to control the rendering algorithm. The frame graph does this by allowing the developer to specify data that describes the rendering algorithm which Qt 3D then translates into the low level code. The approach is data driven which means that the complete rendering approach can be dynamically changed at run-time and without touching any C++ code at all. For more information on the frame graph concept please take a look at this KDAB blog post.

The Qt3DInput module adds support to Qt 3D for reacting to inputs from the traditional mouse and keyboard devices and also allows extension to support other custom input devices such as 3D mice, gamepads, joysticks and anything supported by the QtGamepad module. Qt3DInput also allows you to map multiple physical devices into logical devices and to get analog axis values out of them for use in property bindings or your own custom C++ code.

One thing you will not find in the above libraries is high-level utilities. This is for two reasons. The first is that we want to keep the renderer and other core facilities as generic as possible. Providing a collection of materials based on the traditional Phong lighting model there would bake in some assumptions that we would then need to live with until Qt 6. The second reason is that some of these higher level facilities depend upon more than one Qt 3D library. For example, the camera controllers depend upon multiple Qt 3D libraries libraries for their implementation.

Whilst the above libraries are all stable, we do still have one Qt 3D library marked as unstable for now. The Qt3DExtras library provides a collection of basic geometries, materials and other utilities and integration points. Whilst we do not expect the facilities provided by Qt3DExtras to change much, we did not yet feel comfortable with freezing the API of these higher level helpers. This compromise makes Qt 3D useable out of the box but on the understanding that the API of these classes may evolve a little in the future. Of course you are also free to write your own specialised set of geometries and materials for your own use cases. We will also continue to develop such higher level primitives and package them up into coherent libraries. For example, we may well decide to provide a set of Physics Based Rendering (PBR) materials as seen in the Qt Automotive Suite, or perhaps a set of classes for generating and manipulating geometric shapes.

neptune-pbr1

The Future of Qt 3D

Qt 3D as released with Qt 5.7.0 is just the beginning. KDAB and The Qt Company recently held a Qt 3D planning session in Oulu. Some of the prominent features that we have planned for future releases include:

  • Collision detection
  • Key-frame and morph target animation system
  • Rigid-body physics simulation
  • Qt Quick 2 within Qt 3D
  • Use QPainter to paint on textures
  • PBR materials
  • Dynamic materials
  • Support for more input devices
  • Build time/design time tooling for asset conditioning
  • Profiling and debugging tooling – stand alone and as part of GammaRay

gammaray-qt3d-geometry

In addition to the above features, there is a proof of concept Qt 3D Scene Editor available for you to try. This editor allows you to graphically compose a 3D scene and export it to QML.

scene-editor

We are also working on a Qt 3d profiler and debugging tool that allows you to see details of the jobs executed on the Qt 3D thread pool along with their timings and to issue commands to introspect the internal Qt 3D engine state.

qt3d-profiler

With this initial release of Qt 3D, we now have a powerful framework and foundation on which to build UIs of the future. Please do take Qt 3D for a spin and let us know what you think. If you are interested in getting involved with writing code or shaders, documentation, examples, producing assets, helping with JIRA, then please do get in touch via the development mailing lists or on IRC at #qt-3d.

The post Introducing Qt 3D appeared first on Qt Blog.

ArcGIS Runtime SDK 100.0 by Esri is here

$
0
0

In 100.0, Qt developers have even more capabilities for adding mapping and geographic analysis to native apps than ever before. 3D geographic visualization, 2D vector tiled basemap support, enriched error handling in the API, and additional geoprocessing tools are just a few of the new highlights.

Esri is proud to announce the commercial release of ArcGIS Runtime SDK 100.0 for Qt. This is quite a revolutionary and innovative release for ArcGIS developers. The API architecture is continuing to evolve for those of you who are looking to build great native applications for a wide range of devices and platforms!

In addition, Qt developers have more app deployment and design options. These include the following:

  • Support for writing C++ apps that can target all platforms, including macOS, iOS and Android. Esri is committed to providing as many developer options for Qt developers as possible!
  • Support for separating your QML and C++ business logic. Enabling support for this design pattern frees up the Qt developer to adopt best-design practices while writing great GIS apps!

A few of the highlighted features include, but are definitely not limited to:

  • 3D visualization – On desktop platforms, 3D has been brought to the ArcGIS Runtime for native app development. Build 3D scenes with raster, tiled and vector data sets including 3D specific symbology for enhancing viaualization of your geographic data. 

esri-globe-300

  • Maps and scenes – The Map object has been split out from the view that displays it, to represent the model or viewmodelcomponent in a Model-View-Controller (MVC) or Model-View-ViewModel (MVVM) architecture. This same design is also implemented for Scene objects.

maps-and-scenes-300

  • Military symbology API – On desktop platforms, the API and workflow for using Military symbology has been greatly simplified in this release.

military-symbology-api-200x200

  • Go offline – To make things easy for you, the APIs for common operations such as editing, searching, geocoding or routing are the same whether you are online or offline.

There are too many capabilities to describe in this short post, so go check it out yourself. You’ll be surprised by how much you can achieve with ArcGIS Runtime SDK 100.0 for Qt.

We invite you all to download v100 and get started today!


The post ArcGIS Runtime SDK 100.0 by Esri is here appeared first on Qt Blog.


What’s new in Qt 3D with Qt 5.9?

$
0
0

I am pleased to announce that there are lots of new goodies coming along with Qt 3D as part of the Qt 5.9.0 release as well as the usual round of bug fixes. Engineers from KDAB and The Qt Company have been hard at work over the last months (and will be for some time to come) adding in some of the most frequently requested features. In this article, we will give a brief overview of some of the bigger features coming your way.

Using Qt Quick within Qt 3D

A very common request that we have had since we first released Qt 3D is to have the ability to embed Qt Quick scenes within a Qt 3D application. The use cases for this are wide ranging, but a typical example is to place a 2D user interface onto the surface of some planar piece of geometry in your 3D world to simulate an “in-3D-universe-control-panel”. As VR/AR become more popular, this use case is likely to increase in importance.

I’m happy to say that embedding Qt Quick into a Qt 3D scene is now easily possible. Even better, it is possible to interact with such 2D UIs within the 3D world! The Scene2D QML Example shows how to use the new Scene2D type to render Qt Quick to a texture, apply it to a 3D object, and ensure that events are forwarded to the QQuickItems to allow interactivity.

scene2d


In short, we can render a Qt Quick 2 scene into a texture with Scene2D and register it to receive events from a Qt 3D entity called “cube”:

Scene2D {
    id: qmlTexture
    output: RenderTargetOutput {
        attachmentPoint: RenderTargetOutput.Color0
        texture: Texture2D { id: offscreenTexture }
    }
    
    entities: [ cube ]
    
    Item {
        id: customQtQuickStuff
    }
}

This takes care of rendering the texture. Using it on an Entity is simply a case of applying the resulting texture which can be done with the TextureMaterial:

Entity {
    id: cube

    components: [cubeTransform, cubeMaterial, cubeMesh, cubePicker]

    property real rotationAngle: 0

    Transform {
        id: cubeTransform
        translation: Qt.vector3d(2, 0, 10)
        scale3D: Qt.vector3d(1, 4, 1)
        rotation: fromAxisAndAngle(Qt.vector3d(0,1,0), cube.rotationAngle)
    }

    CuboidMesh {
        id: cubeMesh
    }
    
    TextureMaterial {
        id: cubeMaterial
        texture: offscreenTexture
    }
    
    ObjectPicker {...}
}

The ObjectPicker in the above code is picked up by the Scene2D’s “entities” property and used as a source for events.

The counterpart to Scene2D is Scene3D which allows embedding a Qt 3D scene inside of a Qt Quick 2D UI. Hopefully, in the future, we will be able to get a seamless blend between Qt Quick and Qt 3D.

Physics Based Rendering

Modern rendering engines have largely adopted Physics Based Rendering (PBR) to improve the visual appearance of their results and to make it easier for artists to get predictable results. PBR encompasses a family of techniques but essentially says that rendering should be more physically rigorous when shading than older ad hoc lighting models. For more information and background on PBR please take a look at this talk from Qt Con 2016.

pbr-metal-rough powerup-qt3d-pbr

New to Qt 3D in Qt 5.9 are two new materials: QMetalRoughMaterial and QTexturedMetalRoughMaterial which implement a PBR algorithm with Blinn-Phong specular highlights. There is also a new light type QEnvironmentLight that can be used in conjunction with the above materials to provide nice environmental reflections and image based lighting (IBL) as shown below.

The source code for the above examples are available at KDAB’s github.

Key Frame Animations

Qt Quick has long had support for easily specifying animations using an intuitive API. This can be used along with Qt 3D to animate properties. A frequent request from digital content creators is for support of key frame animations. Also, given the highly threaded architecture of Qt 3D, it would be nice if we could find a way to improve how animations scale compared to having them evaluated by the main thread. The technology preview of the new Qt3D Animation module achieves exactly this.

Whereas the Qt Quick animation API (and the QPropertyAnimation API in C++) specify an animation curve between the start and end times, when using key frame animations we instead specify the property values at specific times known as key frames. To evaluate the animation at times that do not exactly correspond to key frames we use interpolation/extrapolation. For now, Qt 3D Animation implements a Bezier curve interpolation, but we will expand this with other types for Qt 5.10. However, with the key frames being Bezier curve control points, it is already possible to achieve a wide range of animation curves.

The animation curves are specified using QAbstractAnimationClip which boils down doing it programmatically with QAnimationClip or loading baked animation data exported from a digital content creation (DCC) tool with QAnimationClipLoader. Qt 3D provides a handy addon for Blender to export the animation data of objects into the json format consumed by Qt 3D.

bezier-animation-curves


The actual playback of animation data is handled by a new QComponent subclass called QClipAnimator. As with all other QComponents, the clip animator must be aggregated by an entity to give behaviour to the entity. In addition to the raw animation data, the clip animator also needs a way to specify which properties of which target objects should be updated by the animation. This is done with the QChannelMapper and QChannelMapping classes. Please take a look at this blog post showing a simple application that animates a character using the Qt 3D Animation framework. The source code for this can be found at KDAB’s github.

Entity {
    id: cube

    components: [
        Transform { id: cubeTransform },
        Mesh { source: "qrc:/assets/egg/egg.obj" },
        TexturedMetalRoughMaterial { ... },
        ObjectPicker { onClicked: animator.running = true },
        ClipAnimator {
            id: animator
            loops: 3
            clip: AnimationClipLoader { source: "qrc:/jumpinganimation.json" }
            channelMapper: ChannelMapper {
                mappings: [
                    ChannelMapping { channelName: "Location"; target: cubeTransform; property: "translation" },
                    ChannelMapping { channelName: "Rotation"; target: cubeTransform; property: "rotation" },
                    ChannelMapping { channelName: "Scale"; target: cubeTransform; property: "scale3D" }
                ]
            }
        }
    ]
}

The clip animator, animation data, and channel mapper types represent different concepts which are all merged in the familiar Qt Quick and QPropertyAnimation APIs. Separating these out allows us more control and reuse of the individual parts but we will look at adding some convenience API on top for common use cases.

The QClipAnimator class simply plays back a single animation clip. But what if we wish to combine multiple animation clips? We could drop down a level and craft some new animation data that combines the clips but that’s tedious, error prone and doesn’t work well when changing how we combine the clips at a high frequency. Enter QBlendedClipAnimator. Instead of a single animation clip, the API of a blended clip animator takes a pointer to the root of an animation blend tree – a data structure describing how an arbitrary number of animation clips can be blended together. The blend tree consists of leaf nodes representing animation clips and interior nodes representing blending operations such as linear interpolation or additive blending. For more information on blend trees, please take a look at the Qt 3D Overview documentation.

In order to have performance that scales, the Qt 3D Animation framework evaluates the animation curves on the thread pool utilised by the Qt 3D backend. This allows us to scale across as many CPU cores as are made available. Also, it is often the case that the object tree on the main frontend thread doesn’t need to know or care about the intermediate property updates during an animation. Therefore by default, only the final change from an animation is sent to the frontend objects. If you do need the intermediate values, perhaps because you have property bindings depending upon them, then you can subscribe to them via the new QNode::defaultPropertyTrackingMode. The default behaviour is consistent with the Qt Quick Animator types.

In addition to key frame animations, the Qt 3D Animation module introduces initial support for morph target animations that allow blending mesh geometries between a set of specified target shapes. The blending can be controlled via the above key frame animations. This is likely to be moved into the Qt3D Render module once we flesh out the support a little more.

Level of Detail

When building larger 3D scenes it can be useful to only render the full resolution geometry with high-resolution textures when the object is close enough to the camera to justify it. When the objects are farther away, and the projected screen size is small, it makes sense to use lower fidelity models, textures, and perhaps even shaders to reduce the overall rendering cost and therefore increase performance. Qt 5.9 introduces the QLevelOfDetailand QLevelOfDetailSwitch components to enable this.

The QLevelOfDetail component allows you to set an array of the camera to object distance thresholds or projected screen pixel sizes. As these thresholds are reached, the component adjusts its currentIndex property to match that of the corresponding threshold. You can bind to this property (or connect to its notification signal) to do whatever you like in response. For example, use a loader to load a different mesh, set smaller textures, use a simpler material or shader. It’s up to you.

Entity {
    components: [
        CylinderMesh {
            radius: 1
            length: 3
            rings: 2
            slices: sliceValues[lod.currentIndex]
            property var sliceValues: [20, 10, 6, 4]
        },
        Transform {
            rotation: fromAxisAndAngle(Qt.vector3d(1, 0, 0), 45)
        },
        PhongMaterial {
            diffuse: "lightgreen"
        },
        LevelOfDetail {
            id: lod
            camera: camera
            thresholds: [1000, 600, 300, 180]
            thresholdType: LevelOfDetail.ProjectedScreenPixelSizeThreshold
            volumeOverride: lod.createBoundingSphere(Qt.vector3d(0, 0, 0), 2.0)
        }
    ]
}

The QLevelOfDetailSwitch component works in a similar way but implements a common use case where the children of the Entity upon which it is aggregated are all disabled except for the one matching the currentIndex property. This allows you to quickly and easily get a level of detail system into your application.

Entity {
    components: [
        LevelOfDetailSwitch {
            camera: camera
            thresholds: [20, 35, 50]
            thresholdType: LevelOfDetail.DistanceToCameraThreshold
        }
    ]

    HighDetailEntity { enabled: false }
    MediumDetailEntity { enabled: false }
    LowDetailEntity { enabled: false }
}

For the QML users, there is also a LevelOfDetailLoader which, as its name suggests, dynamically loads custom QML components as the level of detail thresholds are reached.

LevelOfDetailLoader {
    id: lodLoader
    camera: camera
    thresholds: [20, 35, 50]
    thresholdType: LevelOfDetail.DistanceToCameraThreshold
    volumeOverride: lodLoader.createBoundingSphere(Qt.vector3d(0, 0, 0), -1)
    sources: ["qrc:/HighDetailEntity.qml", "qrc:/MediumDetailEntity.qml", "qrc:/LowDetailEntity.qml"]
}

Text Support

Although we have support for embedding Qt 3D within Qt Quick and vice versa, it is still nice to be able to directly use textual content within your 3D virtual worlds. Qt 5.9 introduces 2 ways to do this (beyond Scene2D).

First, there is 2D planar text implemented with distance fields just like the default text rendering in Qt Quick. This is done by way of the QText2DEntity

Text2DEntity {
    id: text
    text: "Hello World"
    width: 20
    height: 10
}

This can be positioned freely in 3D space just like any other entity, and so this becomes a first class citizen of your 3D world.

For those of you that want solid, extruded, 3-dimensional text, there is the QExtrudedTextGeometry class. Or for even more convenience, there is the analogous QExtrudedTextMesh which is a subclass of the QGeometryRenderer component and can, therefore, be directly aggregated by an entity.

auto *text = new Qt3DCore::QEntity(root);

auto *textTransform = new Qt3DCore::QTransform();

auto *textMesh = new Qt3DExtras::QExtrudedTextMesh();
textMesh->setDepth(.45f);
QFont font(family, 32, -1, false);
textMesh->setFont(font);
textMesh->setText(QString(family));

auto *textMaterial = new Qt3DExtras::QPhongMaterial(root);
textMaterial->setDiffuse(QColor(111, 150, 255));

text->addComponent(textTransform);
text->addComponent(textMesh);
text->addComponent(textMaterial);

3d-text

If you need any other kinds of text support in Qt 3D please let us know.

Summary

I hope that this has given you a good overview of the new features coming to Qt 3D with Qt 5.9. We think that you will find them useful in building ever more ambitious 3D projects with Qt. We have even more surprises in the pipeline for Qt 5.10 so watch this space.

The post What’s new in Qt 3D with Qt 5.9? appeared first on Qt Blog.

Qt 3D Studio Source Code and Pre-Release Snapshots Available

$
0
0

As you may remember we announced in February that we are working on a new 3D design tool called Qt 3D Studio, which is based on a major contribution from NVIDIA. Now we are happy to announce that the code has been pushed into the Qt Project repositories and binary snapshots are available through the Qt online installer.

What is Qt 3D Studio?

  • Qt 3D Studio is a world class 3D User Interface design tool formerly known as NVIDIA Drive Design
  • Cross-platform Qt application supporting Windows, Mac and Linux as development hosts
  • Supports importing design assets from popular authoring tools such as Photoshop, Autodesk Maya and The Foundry MODO
  • Contains an extensive in-built material and effects library
  • Enables rapid prototyping with keyframe animations using the powerful timeline editor
  • Seamlessly integrates with Qt Quick and other modules of the Qt framework
Real-time 3D User interfaces can be easily created with Qt 3D Studio

Real-time 3D User interfaces can be easily created with Qt 3D Studio


What has been done in the past 7 months?

Quite some time has passed since the contribution from NVIDIA was received and some may wonder what have we been up to. As the original application was implemented mostly with Windows only MFC we wanted to port it to Qt first before opening the repositories. We have also been cleaning out many of the originally used 3rd party libraries as Qt provides the needed functionality already.

Here are a few items we been working with:

  • User interface has been ported from MFC to Qt so Studio supports also Mac and Linux
  • Look and feel of the application has been slightly updated
  • Qt / QML API has been extended and a new C++ API created
  • Some of the 3rd party components replaced with Qt based implementation to minimize the dependencies and reduce the size of the codebase
  • Changed to Qt build systems and implemented CI integration
  • Analyzing the architecture and benchmarking the in-built rendering to Qt 3D.

Integrating Qt 3D Studio UI’s to Qt applications

One of the areas we have been extending the functionality of the Qt 3D Studio is the integration to Qt and especially to Qt Quick. Now Qt 3D Studio offers easy 2-way integration to Qt Quick:

  • Qt 3D Studio scenes can be easily integrated inside Qt Quick based applications
  • Qt Quick views can be rendered into 3D elements as textures

Working with Qt Creator Designer allows seamless editing of Qt Quick items of the UI

Working with Qt Creator Designer allows seamless editing of Qt Quick items of the UI

In this example the 3D scene contains gauges that have changing content. Gauges have been implemented with 3D Studio which enables use of real time shading and lighting effects. Qt Quick user interfaces (e.g. calendar, music player contacts) are rendered as textures into gauges. Qt Quick application also manages the 3D user interface states changes through the Qt Quick API. 2D parts of the user interface have been designed with Qt Quick Designer.

Roadmap

We are working hard to get the first official release of the new Qt 3D Studio ready by end of November. Multiple pre-release snapshots will be made available and we are interested in receiving bug reports from the pre-releases and perhaps even some code contributions. After the 1.0 release we are planning the make patch releases as needed, and possibly also 1.x feature releases. In May 2018 we are planning to release 2.0 version bringing a new runtime on top of Qt 3D. Applications created with 1.0 are fully compatible with 2.0, just the runtime is changed to allow better portability and other benefits provided by Qt 3D.

Qt 3D Studio Roadmap

Early Access Releases

We have been running an early access program for key customers and selected partners. Working closely with some of the customers has provided us with a valuable feedback on the features and tool usability. We  have also conducted a series of usability tests for finding common problems when users start using the tool for the first time. We have been able to include fixes for some of these findings already into the forthcoming 1.0 release.

1.0  and 1.x releases

First official release is scheduled for the end of November. The whole Qt 3D Studio user interface has been ported to Qt which makes this the first cross-platform release i.e. Windows, Mac and Linux are supported. We have also introduced a remote deployment feature to Qt 3D Studio Viewer which enables automatically seeing design changes live in the target device or for example an Android tablet.

Minor 1.x releases introduce mainly customer requested usability improvements, extended hardware and embedded operating system support and performance improvements.

2.0  release

2.0 Release scheduled in May 2018 will introduce a bigger architectural change where the NVIDIA rendering engine will be replaced with a new rendering engine built on top of Qt 3D. From user perspective this change should not introduce any discontinuity i.e. all projects implemented with Qt 3D Studio 1.0 are working with Studio 2.0 as is. After these changes we have the full ability to implement new features and improvements both on UI level and 3D rendering.

Getting Qt 3D Studio

The post Qt 3D Studio Source Code and Pre-Release Snapshots Available appeared first on Qt Blog.

CPU usage improvements in Qt 3D

$
0
0

Many improvements have been made to Qt 3D since the release of Qt 5.6, our previous long-term-support (LTS) release. Engineers from KDAB and The Qt Company have been working hard to bring new features to Qt 5.9 LTS, many of which are listed in the What’s new in Qt 3D with Qt 5.9 blog post by Sean Harmer from KDAB. While more features are still on the way (such as a Vulkan backend), the focus in the latest releases has shifted towards performance and stability. The performance has in fact improved greatly since Qt 5.6, especially for complex scenes and scenes with large frame graphs.

Scenes with many viewports typically result in large frame graphs because each viewport corresponds to a leaf node. If you are not familiar with the frame graph concept in Qt 3D and how powerful it is, you should check out Paul Lemire’s blog post at kdab.com. The screenshot below is from one of our internal benchmarks; a fairly simple (and colorful) scene with 28 viewports:

Qt 3D benchmark with many viewports

The CPU usage in this benchmark has gone significantly down from Qt 5.6.2 to Qt 5.9.2, and the Qt Company is working together with the engineers in KDAB on a series of changes that we expect will make the CPU usage drop even further in Qt 5.11:

viewport-benchmark-results

Many of the performance improvements have been driven forward by the port of the Qt 3D Studio runtime to be based on Qt 3D. Although the runtime is planned for a release next year, we are already now adding performance improvements to the current Qt 5.9.x LTS series. Here are some benchmark results from our internal Qt3D Studio examples:

3dstudio-benchmark-results

Performance improvements are added in many parts of Qt 3D. We have for instance also added support for efficient file formats, such as glTF2. In this post, we will go into details about some of the changes we are making to reduce the CPU usage, while in a later post, we will discuss reductions in memory consumption.

Improving the job dependency solver

One of the performance improvements we have made was to the Qt 3D job dependency solver. Qt 3D divides work that needs to be done each frame into separate, smaller jobs that can be run in parallel. The jobs are part of the flexible backend/frontend architecture of Qt 3D, which separates the frontend on the main thread from the backend, which consists of aspects that perform the rendering, input handling, and animation (more on this in the Qt 3D Overview docs).

The backend runs jobs from the different aspects on a thread pool, and each job can define dependencies on other jobs that should run before it. These dependencies need to be resolved efficiently, because the jobs often change from one frame to another. While this is simple when the number of jobs is small, it becomes increasingly time-consuming for complex scenes with large frame graphs.

By profiling our examples with Callgrind, we found performance bottlenecks in certain parts of the job dependency solver. Specifically, a large QVector of all dependencies would be resized whenever jobs were finished and corresponding dependencies could be removed from the list. This drastically reduced the performance.

We started working on a solution where we would get rid of the QVector altogether and store two lists on the jobs instead: One list of who the job has dependencies on and one list of who depends on it.

class AspectTaskRunnable {
    // ... other definitions
    QVector m_dependencies;
    QVector m_dependers;
};

With this solution, when a job finished, it could go through its list of m_dependers and remove itself from the depender’s list of m_dependencies. If their list was now empty, that job could also be started. However, we now had many small QVectors that were resized all the time. Although better than resizing a big QVector, it was still not optimal.

Finally, we realized that because the dependencies cannot change while jobs are running, there was no need to track both who depends on a job and who the job is dependent on. For each job, it is enough to know which jobs depend on it, and only the number of jobs it is dependent on.

class AspectTaskRunnable {
    // ... other definitions
    int m_dependencyCount = 0;
    QVector<AspectTaskRunnable*> m_dependers;
};

Whenever a job is finished, we go through the list of jobs depending on it, and subtract their dependency count by one. The latter code looks something like this (shamelessly simplified for readability):

void QThreadPooler::taskFinished(AspectTaskRunnable *job)
{
    const auto &dependers = job->m_dependers;
    for (auto &depender : dependers) {
        depender->m_dependencyCount--;
        if (depender->m_dependencyCount == 0) {
            m_threadPool.start(depender);
        }
    }
}

By implementing this change, the job dependency solver became an insignificant contributor to the CPU usage, and we could start focusing on other bottlenecks.

Improving the performance of QThreadPool

Other parts of Qt are also benefiting from optimization opportunities found in our benchmarks. For instance, Qt 3D uses QThreadPool from Qt Core to automatically manage the jobs and allocate them to different threads. However, similarly to the previous case, QThreadPool used to store jobs in a QVector which would be resized whenever a job was finished. This is not a big issue for use cases with few jobs, but suddenly became a bottleneck for complex Qt 3D scenes with a large number of jobs.

We decided to change the implementation in QThreadPool to use larger “queue pages” and put pointers to these pages in a QVector. In each page, we keep track of the index of the first job in the queue and the index of the last job in the queue:

class QueuePage {
    enum {
        MaxPageSize = 256;
    }; 

    // ... helper functions, etc.

    int m_firstIndex = 0;
    int m_lastIndex = -1;
    QRunnable *m_entries[MaxPageSize];
};

Now, all we have to do is increment the first index whenever a job is finished and increment the last index when a job is added. If there is no more room in the page, we allocate a new one. It’s a simple and low-level implementation, but it’s also way more efficient.

Caching the results of specific jobs

Next, we found that certain jobs stood out as very CPU-demanding. Some of these jobs, such as the QMaterialParameterGathererJob, were doing a lot of work each frame even though the results from previous frames were the same. This was a clear opportunity for caching the results to improve the performance. First, let us have a look at what QMaterialParameterGathererJob does.

In Qt 3D, you can override the values of every parameter defined in a QRenderPass by setting it on the QTechnique, QEffect or QMaterial which is using that render pass. Each parameter is in turn used to define a uniform value in the final shader program. This code shows a QML example where the parameter "color" is set on all levels:

Material {
    parameters: [
        Parameter { name: "color"; value: "red"}
    ]
    effect: Effect {
        parameters: [
            Parameter { name: "color"; value: "blue"}
        ]
        techniques: Technique {
              // ... graphics API filter, filter keys, etc.

              parameters: [
                  Parameter { name: "color"; value: "green"}
              ]
              renderPasses: RenderPass {
                  parameters: [
                      Parameter { name: "color"; value: "purple"}
                  ]
                  shaderProgram: ShaderProgram {
                      // vertex shader code, etc.

                      fragmentShaderCode: "
                          #version 130
                          uniform vec4 color;
                          out vec4 fragColor;
                          void main() {
                              fragColor = color;
                          }
                      "
                  }
              }
          }
    }
}

To figure out the final value of a parameter used in the shader program, QMaterialParameterGathererJob goes through all the materials in a scene and finds the corresponding effects, techniques, and render passes. Then, by prioritizing parameters set in QMaterial over QEffect, QTechnique, and QRenderPass, we determine the final value of the parameter.
In this case, the value is "red", because the QMaterial parameters have the highest priority.

Gathering all parameters is quite time-consuming in large scenes with many materials, and showed up as a bottleneck for some of our Qt 3D Studio examples. We therefore decided to cache the parameter values found by the QMaterialParameterGathererJob, but quickly understood that the cache would always be invalidated if the values changed every frame. This is a common case, especially if parameters are animated. Instead, we decided to cache pointers to QParameter objects rather than their values. The values are then stored outside of the cache, and are fetched only when needed. Caching the results resulted in a huge performance boost in scenes with many parameters, as we only had to run the job when there are larger changes in the scene, such as when materials are added.

We have worked with many cases like this, where we have taken some of our larger examples, profiled them, identified bottlenecks in specific jobs, and worked to find ways to improve the performance or cache the results. Thankfully, the job-based system in Qt 3D makes it easy to optimize or cache specific jobs independently, so you can expect more improvements like this to land in the upcoming Qt 3D releases.

The post CPU usage improvements in Qt 3D appeared first on Qt Blog.

Qt 3D Studio 1.0 Released

$
0
0


We are happy to announce that Qt 3D Studio 1.0 has now been released. Qt 3D Studio provides a 3D user interface authoring system that caters for both software developers and graphic designers.

Qt 3D Studio Editor

Qt 3D Studio is the authoring tool for creating interactive 3D presentations and applications. Editor is a cross-platform Qt application which can be used in Windows, Mac and Linux. You can import design assets from popular authoring tools such as Photoshop, Autodesk Maya and The Foundry MODO.

qt3dstudioviewer

Qt 3D Studio Editor & Viewer with the remote connection feature

Qt 3D Studio Viewer

Qt 3D Studio Viewer is a great tool for testing the design in action. You can also use the remote connection feature built in to the Studio to connect to a device running the Viewer to see immediately the design changes in the device. We have published the Viewer application in the Google Play for easy start with Android devices.

Viewer can also generate image sequences  from Qt 3D Studio scenes which can then be animated or combined into a video. This is especially useful for example if you are using the same user interface also in devices which don’t have enough resources to run a full-blown 3D user interface. This allows you to use the same tools and workflow in both cases. This feature can be used to create videos you can easily share during the design process.

Installation & Platform support

Editor & Viewer are released for Windows & macOS. Linux is also supported, but pre-built binaries are not yet provided with the 1.0 release. So Linux users need to build from source. Please also refer to the build instructions if you are creating applications for Android or embedded targets. In addition to Windows, Mac, Linux and Android the Qt 3D Studio 1.0 supports embedded Linux as well as INTEGRITY and QNX real-time operating systems as deployment targets. In the future we will continue adding more platforms such as iOS. For detailed platform support please refer to documentation.

Easiest way to install the Qt 3D Studio is through the online installer where you can find it under Tools -section. If you don’t yet have the online installer you can get from our download page. If you are an existing commercial license holder you can find the relevant packages from Qt Account. Also offline installer packages are provided.

Please also remember that Qt 3D Studio relies on the development host and target device graphics adapter and drivers. During the development we have encountered some occasions where updating to latest drivers have fixed the issues user has been experiencing. If you encounter some issues, please post a report in our bug tracker.

How to get started – Documentation & Examples

As part of the installation packages we are providing sample projects and we have also added some demonstration applications to a separate git repository https://git.qt.io/public-demos/qt3dstudio. We will be adding examples and demo applications along the way so stay tuned. Documentation is available at http://doc.qt.io/qt3dstudio/index.html

Home Automation demo implemented with Qt 3D Studio and Qt Quick

Licensing

The Qt 3D Studio Editor is available for all Qt commercial licensees without any additional cost. Also the Qt 3D Studio Runtime can be used as part of desktop and mobile Qt applications without any additional cost. For open-source users Qt 3D Studio Editor and Runtime are available under GPLv3 license. For embedded devices, a separate distribution agreement is needed to cover the Qt 3D Studio Runtime (i.e. joint hardware and software distribution).

Way forward

We are planning on releasing bug fix releases as needed and the next feature release (1.1.0) will introduced around early February. Biggest change in next feature release is the new Data Node API which introduces a clearer separation between UI and application logic. Data Nodes works a “contract” between the UI designer and application developer and makes it easier to use the same data in several UI components. Also as mentioned already earlier we are working on a new Qt 3D Studio Runtime which is built on top of Qt 3D. The new Runtime will be released as part of Qt 3D Studio 2.0 release, planned for May 2018.

The post Qt 3D Studio 1.0 Released appeared first on Qt Blog.

Increasing the number of lights in Qt 3D

$
0
0

While it is possible to draw scenes with almost unlimited numbers of lights using deferred rendering in Qt 3D, the default materials in Qt 3D Extras have been limited to eight lights because they are tied to forward rendering. Although we apply a few tricks that allow you to define more than eight lights in the scene, we only select the eight closest lights when rendering.

In the scene below, we have defined 100 lights that float around, but because only 8 of them are in use at the time and you can see how they pop in and out:

Although it’s possible to support more lights in other pipelines (this is for instance the case with the Qt 3D Studio Runtime), we also want the default materials in Qt 3D Extras to be able to use a larger number of lights, even when used with forward rendering.

The reason behind the current limit is that we need to support a range of OpenGL architectures, including some which are quite limited in terms of how much uniform data can be passed to the shader. We therefore need to pass a small array of light structs to the shader and loop over the lights in the fragment shader. Unfortunately, such loops are also very expensive on hardware with limited resources because they compile to a large number of shader program instructions. Sometimes so many that the resulting shader program won’t compile at all.

We have therefore started work on a solution that will both allow us to increase the number of lights on beefy hardware and at the same time reduce the number of shader program instructions on weaker hardware. It is based on Qt 3D’s new internal shader graph, which was recently introduced by Kevin Ottens from KDAB.

The shader graph is a game changer for Qt 3D. It allows us to build shaders dynamically with a structure similar to the material graphs you find in many modern 3D modeling applications. Each node in the graph can be thought of as a function – it is defined as a computation, takes a set of input values, and produces output values. For instance, a surface node can take the incoming and outgoing angles of light, the light color, and the surface color, and compute the resulting light contribution. By connecting nodes in the graph, you define the flow of computations in the shader program, which is translated to instructions in a programming language. Because all the computations are abstract, they can easily be translated to many different shader languages (or dialects), making it trivial to produce the same material definitions for different architectures.

In terms of increasing the number of lights, the great thing about the shader graph is that we can easily define a shader node for each of the lights in the scene. The graph then results in the right number of light calculations when converted to shader code. Instead of having a for loop inside the shader itself, we loop over the lights when the shader is generated. This is basically unrolling the old loop, which is way more efficient and allows us to have a much higher number of lights.

I am currently working on a prototype where we have moved the lighting system on top of the shader graph. While this work is still highly experimental, it is already producing some promising results. Here’s the same scene as above, but this time we are actually seeing 100 lights in use at the same time:

Before this becomes part of the default materials in Qt 3D Extras, we also want to change how lights are gathered in a scene and passed on to the shaders. Currently, the light gathering is tightly coupled with the rendering code, but we want to reduce the number of assumptions we make and give you more control over how light information is passed to your shaders. In turn, this will also make it easier to create applications that can switch between rendering modes, for instance if you want to support both forward and deferred rendering of the same scene

If this sounds interesting for your applications, feel free to share thoughts on how you would like to work with lights in your code.

The post Increasing the number of lights in Qt 3D appeared first on Qt Blog.

Towards an Improved Qt 3D Studio Runtime

$
0
0

Now that Qt 3D Studio 1.0 has been released, it is time to have a sneak peek at some of the upcoming developments. As outlined in the release announcement, there is work on-going to move the runtime, meaning the engine that renders and runs the scenes, on top of Qt 3D. Let’s take a closer look at this.

Overview

Scenes and Layers

Qt 3D Studio is a design tool that allows rapid development of 3D scenes, focused on, but not limited to, 3D user interfaces. Once assets like 3D models and texture maps are imported, designers create scenes by placing and transforming 3D models, applying materials, and setting up keyframe-based animations that target properties of the models, materials and layers. The concept of layers map naturally to what one may be familiar with from tools like Photoshop: each layer contains a 3D scene with its own camera. These are then composited together based on their position, size and blending settings, thus forming the final output of the rendering.

On the layer level there are multiple antialiasing techniques available, like multisampling, supersampling, progressive and temporal antialiasing. See the documentation for an overview of these.

Slides

All this is complemented by a slide system, not unlike presentation tools like Powerpoint. A slide could be thought of as a state: it defines the set of active (visible) objects, the property changes that get applied to the various scene objects, and the set of animations that start when entering the slide in question. This is complemented by the concept of the master slide, which allows defining a set of objects and animations that are present on all slides.

Materials

When the default material, that provides pixel-based lighting, directional, point and area lights, shadow mapping, screen space ambient occlusion, image-based lighting and a number of other features, is not sufficient, custom materials can be applied. These provide custom (fragment) shader code together with a set of properties that form the input to the shaders. Such properties are editable and animatable in the editor just like the built-in ones. While many custom materials will contain a single shader, they can also contain multiple ones, thus defining multiple passes that run in order, each of them further processing the results of the previous passes.

Effects

To apply effects on the content of a given layer, post-processing effects can be used. These are similar to custom materials, but take the output of the 3D rendering from a given layer as their input. Conceptually they map to the ShaderEffect items of Qt Quick but are somewhat more powerful.

Sub-presentations

While one presentation (a single .uip file) describes a single scene (albeit with multiple layers, hence it is more like a 2D composition of multiple 3D scenes), it is possible to have multiple presentations loaded and run in parallel. Here one presentation serves as the “main” one, which is the presentation that gets rendered to the screen. The others serve as sub-presentations that are first rendered offscreen, and then used as texture maps in the materials of the main scene. They can also be used as the source for one or more of the layers of the main presentation.

Building on this, Qt 3D Studio also offers interoperation with Qt Quick. This is achieved by the familiar QQuickRenderControl. This means that interactive Qt Quick scenes can be displayed inside the Qt 3D Studio scene.

This list, while already long enough, does not cover everything. See the documentation for more details.

Qt 3D Studio in action

Qt 3D Studio in action

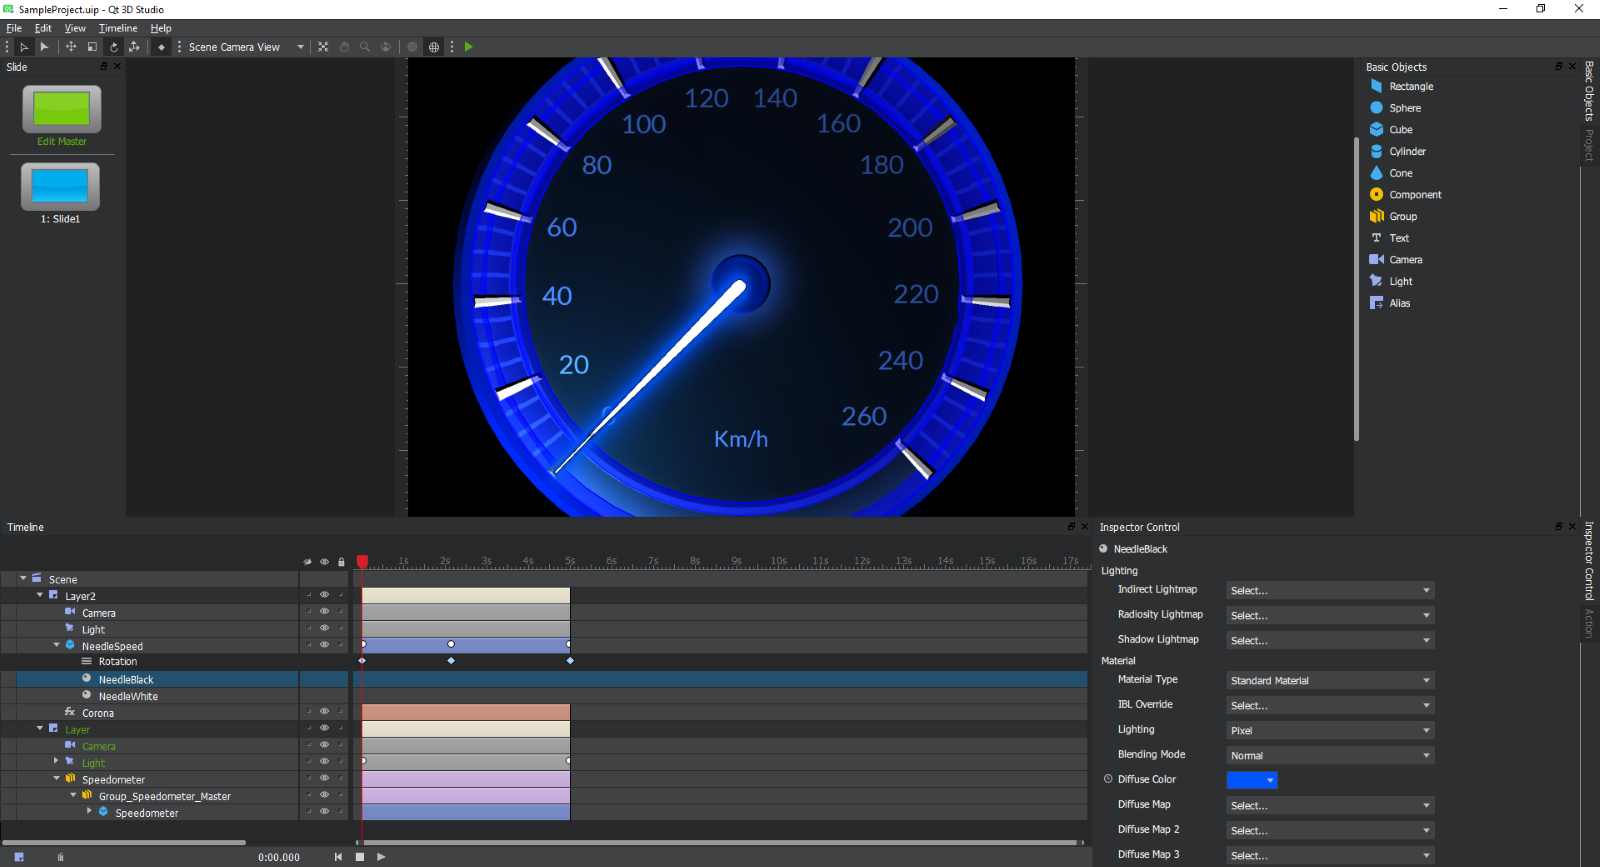
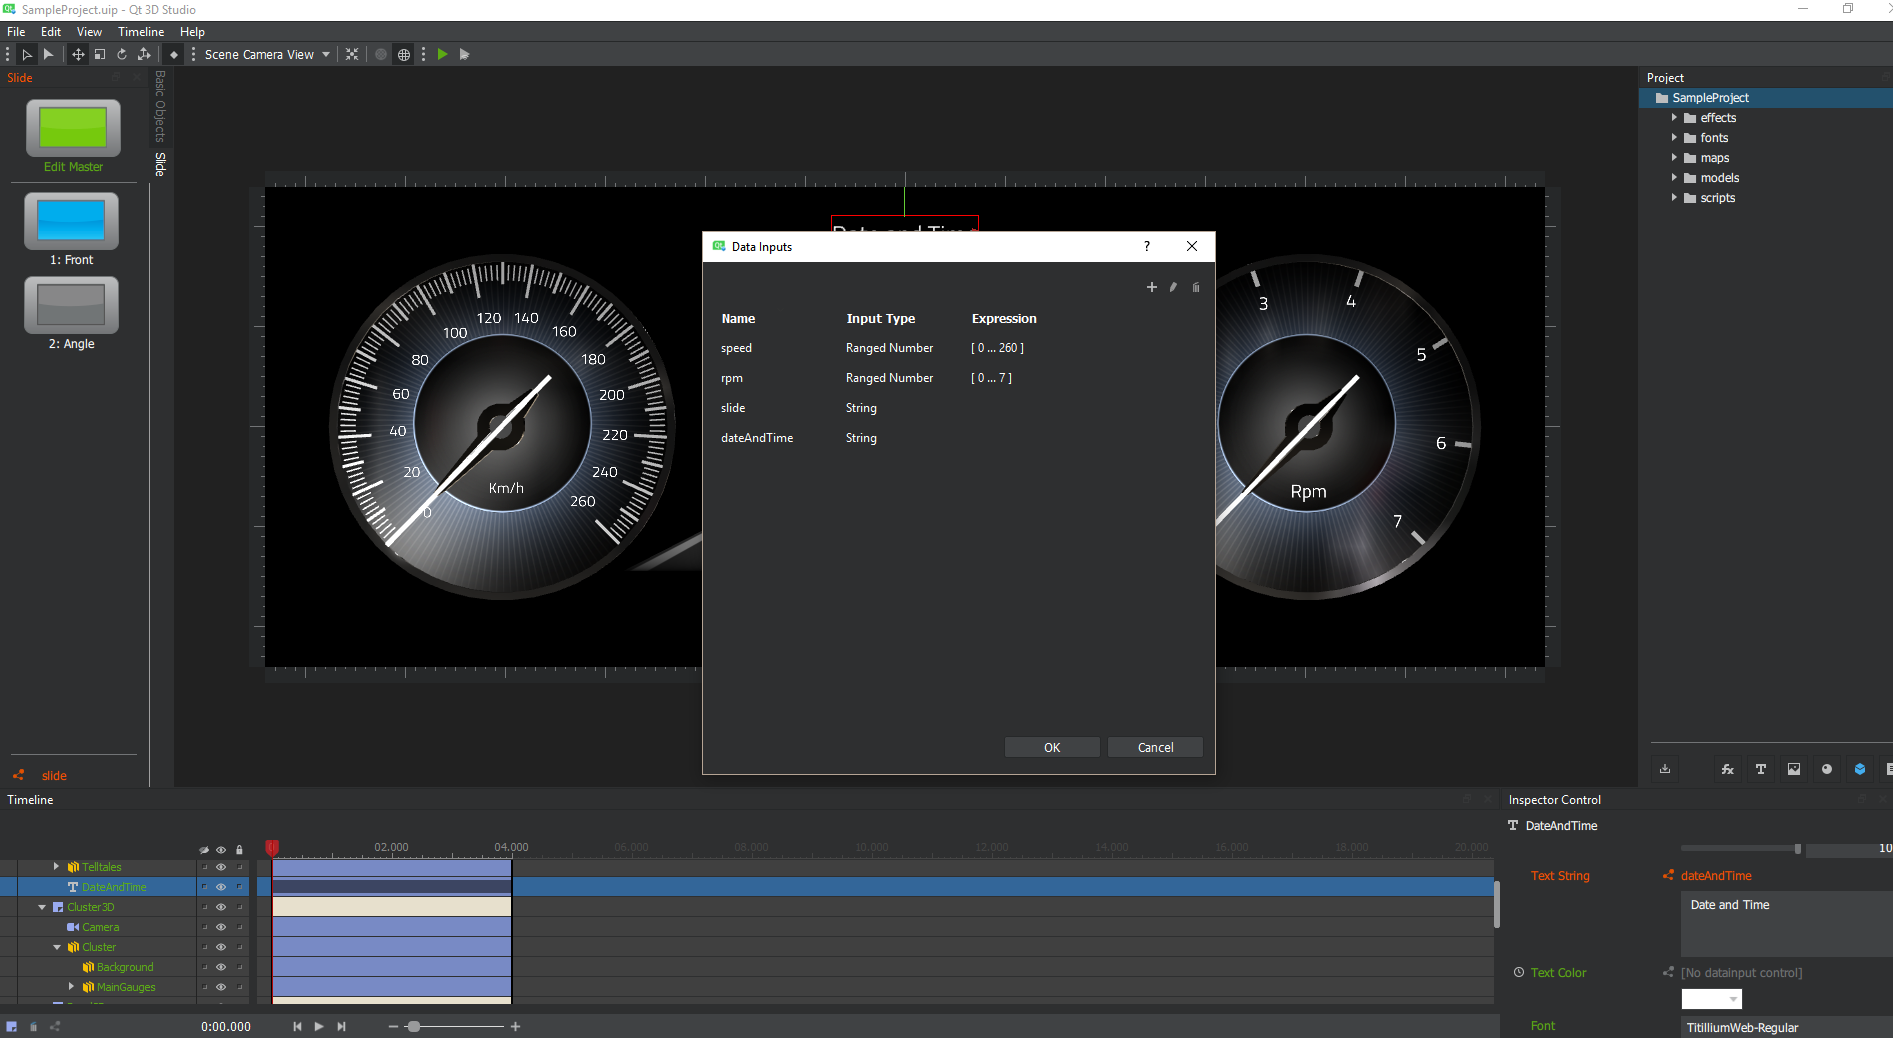
The screenshot shows many of the facilities mentioned above:

  • The slide management pane on the left,
  • the pane on the right that displays either basic objects (that can be dragged into the scene) or the presentation and asset browser (where 3D models and texture maps are dragged and dropped in order to import assets, and then dragged into the scene or the scene browser below),
  • the bottom pane contains the scene browser (note how the example has two layers, each with its own camera, lights and models) and the timeline that is used to define and edit keyframes,
  • the bottom-right pane, showing the properties for the currently selected model, material or other object.

What’s in a Runtime?

The main editor application is complemented by the so-called runtime component, which consists of the C++ and OpenGL-based engine that renders and runs the presentations created with the editor both in the viewer application shipped with Qt 3D Studio and in any other Qt applications. The APIs provided allow integrating Qt 3D Studio scenes into Qt Quick, QWidget and QWindow-based applications, and also provide facilities for rendering completely offscreen in order to generate videos for example. The rendering APIs are complemented by a set of QML and C++ APIs that allow changing properties of the scene objects at runtime and controlling the slide and animation system. See the links to the documentation for more details.

Qt 3D Studio Viewer example

The same scene in the standalone Qt 3D Studio Viewer application

For an impression of what the APIs Qt application developers would use look like, let’s look at the source of two of the included examples. First, a straightforward pure QWindow-based application (can be found under example/studio3d/surfaceviewer):

#include <QtStudio3D/Q3DSSurfaceViewer>
#include <QtStudio3D/Q3DSViewerSettings>
#include <QtStudio3D/Q3DSPresentation>
#include <QtStudio3D/Q3DSSceneElement>
#include <QtStudio3D/Q3DSElement>
...
int main(int argc, char *argv[])
{
    QGuiApplication app(argc, argv);

    QWindow window;

    QSize size(1200, 800);
    window.resize(size);
    window.setSurfaceType(QSurface::OpenGLSurface);
    window.setTitle(QStringLiteral("Qt 3D Studio surface viewer example"));
    window.create();

    QOpenGLContext context;
    context.setFormat(window.format());
    context.create();

    Q3DSSurfaceViewer viewer;
    viewer.presentation()->setSource(QUrl(QStringLiteral("qrc:/presentation/circling_cube.uip")));
    viewer.setUpdateInterval(0);
    viewer.settings()->setScaleMode(Q3DSViewerSettings::ScaleModeFill);
    viewer.settings()->setShowRenderStats(true);

    Q3DSSceneElement sceneElement(viewer.presentation(), QStringLiteral("Scene"));
    Q3DSElement counterElement(viewer.presentation(), QStringLiteral("Scene.Layer.Loopcounter"));

    viewer.initialize(&window, &context);

    window.show();

    int n = 0;
    QString loopCounter = QStringLiteral("Loop %1");
    QObject::connect(&sceneElement, &Q3DSSceneElement::currentSlideIndexChanged, [&]() {
        if (sceneElement.currentSlideIndex() == 1)
            n++;
        counterElement.setAttribute(QStringLiteral("textstring"), loopCounter.arg(n));
    });

    return app.exec();
}

In practice one will likely rather use the Qt Quick integration, at the core of which stands the Studio3D element. Under the hood this is built on QQuickFramebufferObject. (the snippet here is from examples/studio3d/qmldynamickeyframes).

import QtQuick 2.7
import QtStudio3D 1.0

Item {
    ...
    
    Studio3D {
        id: studio3D
        anchors.fill: parent

        // ViewerSettings item is used to specify presentation independent viewer settings.
        ViewerSettings {
            scaleMode: ViewerSettings.ScaleModeFill
            showRenderStats: false
        }

        // Presentation item is used to control the presentation.
        Presentation {
            source: "qrc:/presentation/dyn_key.uip"

            // SceneElement item is used to listen for slide changes of a scene in the presentation.
            // You can also change the slides via its properties.
            SceneElement {
                id: scene
                elementPath: "Scene"
                onCurrentSlideIndexChanged: {
                    console.log("Current slide : " + currentSlideIndex + " ("
                                + currentSlideName + ")");
                }
                onPreviousSlideIndexChanged: {
                    console.log("Previous slide: " + previousSlideIndex + " ("
                                + previousSlideName + ")");
                }
            }

            // Element item is used to change element attributes
            Element {
                id: materialElement
                elementPath: "Scene.Layer.Sphere.Material"
            }

            property int desiredSlideIndex: 1
            property int colorIndex: 0
            property var colorArray: [
                [1.0, 1.0, 1.0],
                [1.0, 0.0, 0.0],
                [0.0, 1.0, 0.0],
                [0.0, 0.0, 1.0],
                [0.0, 1.0, 1.0],
                [1.0, 0.0, 1.0],
                [1.0, 1.0, 0.0]
            ]

            function nextSlide() {
                // Separate desiredSlideIndex variable is used to keep track of the desired slide,
                // because SceneElement's currentSlideIndex property works asynchronously.
                // This way the button click always changes the slide even if you click
                // it twice during the same frame.
                desiredSlideIndex = desiredSlideIndex != 3 ? desiredSlideIndex + 1 : 1;
                scene.currentSlideIndex = desiredSlideIndex
                slideButtonText.text = "Change Slide (" + desiredSlideIndex + ")"
            }

            function resetTime() {
                scene.goToTime(0);
            }

            function changeColor() {
                colorIndex = colorIndex >= colorArray.length - 1 ? colorIndex = 0 : colorIndex + 1;
                materialElement.setAttribute("diffuse.r", colorArray[colorIndex][0]);
                materialElement.setAttribute("diffuse.g", colorArray[colorIndex][1]);
                materialElement.setAttribute("diffuse.b", colorArray[colorIndex][2]);
                changeColorButton.color = Qt.rgba(colorArray[colorIndex][0],
                                                  colorArray[colorIndex][1],
                                                  colorArray[colorIndex][2], 1.0);
            }
        }
        onRunningChanged: console.log("Presentation running")
    }
    ...

(Before anyone asks: The ability to embed the output of the various Qt UI frameworks into each other opens up the possibility for creative recursive solutions indeed. However, while the idea of embedding a Qt Quick scene into a Qt 3D Studio scene embedded again in Qt Quick which then perhaps gets embedded into a plain Qt 3D scene which in turn can be part of another Qt Quick scene, … may sound exciting at first, it is best not to overdo it.)

Of course, the editor application itself also needs to display, edit and have fine-grained control over the scene. In the current iteration (1.0) not everything is unified in this respect, meaning the way the editor renders under the hood is not necessarily based on the same code as in the viewer or in the external applications. Longer term we expect to have a more unified approach in place. For now, let’s focus on the runtime from the perspective of a typical Qt application.

Towards Qt 3D Studio 2.0

You said C++ and OpenGL. Good enough, no?

The 1.0 runtime is pretty portable already and it comes with the necessary Qt integration bits as shown above. However, as it is based on the code inherited from the original NVIDIA contribution with only certain parts Qt-ified, and with a strong dependency to OpenGL, there is room for improvement. Fortunately, it turns out we have a good way forward – while staying fully compatible with presentations created with the already released version 1.0.

Qt 3D 2.0 (not to be confused with the Qt 3D 1.0 project from Qt 4 times) has been introduced to Qt 5 by developers from KDAB. See this post for an introduction. Besides providing the necessary building blocks, like an entity-component system and the concept of framegraphs that turn out to be an excellent tool for describing how to render multi-pass 3D scenes in a data-driver manner, its abstractions become handy also when looking towards the future where graphics APIs other than OpenGL will play an increasingly important role.

Therefore, back in April we started a little experiment under the Dragon3 internal codename to see what it would take to load and run those .uip presentations on top of Qt 3D. The new code base is developed with the familiar Qt style and conventions, thus providing a better, more maintainable, and more future-proof component in the larger Qt ecosystem. This is the project now often referred to as the Qt 3D Studio Runtime 2.0, with a first release due around May 2018 together with Qt 3D Studio 2.0. Like Qt 3D Studio itself, the code is available in public already today, although it does come with a huge disclaimer of being heavily work in progress.

Should I wait then?

Not at all. As mentioned before, compatibility is a priority, so for all practical purposes the 1.0 release is the thing to use. Naturally those who feel like experimenting are welcome to check out the code from the qt3d-runtime repository as well (which needs the dev (eventually 5.11) branch of qtbase and qt3d to build).

Let’s continue in the next post. In the meantime those who cannot wait and are keen on diving into the juicy details can check out my presentation at the Qt World Summit earlier this year.

That’s all for now, happy 3D hacking!

The post Towards an Improved Qt 3D Studio Runtime appeared first on Qt Blog.

Memory usage improvements in Qt3D

$
0
0

Together with engineers from KDAB and the Qt community, we are continuing to improve performance and stability of Qt3D. Back in November, I wrote about how we have reduced CPU usage in Qt3D. In this post I would like to share some improvements we have made to reduce memory consumption.

Qt 3D has a flexible architecture that separates the frontend, which runs on the GUI thread, from the backend, which consists of aspects responsible for rendering, input handling, and animation. The aspects are run on a separate thread and can start jobs that are run on a thread pool. This allows Qt 3D to make use of needed CPU resources in parallel, but it also means we need to keep data duplication to a minimum. By reducing the amount of duplicated data and improving the allocation strategy for backend objects, the memory usage has been significantly reduced.

Even small projects benefit from these improvements, such as the Simple C++ example, which uses no textures or other assets:

Simple C++ Example

On my Linux desktop, this example is down from 92 MB in Qt 5.6.3 to 47 MB on Qt 5.9.4:

Qt3D simple-cpp example RAM usage

The same can be seen in more complex applications, such as this internal demo application for an automobile instrument cluster. It is using Qt Quick and Qt 3D to render the dashboard of an electric car. The demo has a number of different views for navigation, media, and a consumption overview. It also renders a live 3D model of the car with multiple textures:

Qt3D and QtQuick instrument cluster

The memory usage in this example has dropped from about 220 MB of RAM in Qt 5.6.3 to 135 MB in Qt 5.9.4:

Qt 3D instrument cluster demo RAM usage

We are working hard to improve performance and stability further in upcoming releases. In Qt 5.10.1 we have improved on-demand rendering performance, while in Qt 5.11 we streamline the order in which rendering jobs are executed. This ensures stability and allows for more performance improvements in the future. In later releases, we will increase data caching between frames to reduce the amount of work even further.

The post Memory usage improvements in Qt3D appeared first on Qt Blog.


Qt 3D Studio 2.0 Beta Available

$
0
0

We are getting close to releasing the Qt 3D Studio 2.0 and the first Beta is released today. First beta packages are now available through the Qt online installer & Qt download. Let’s have a quick summary of the changes & new features we are introducing. For detailed information about the Qt 3D Studio please visit our web pages at: https://www.qt.io/3d-studio

New Runtime & Viewer Application

One of the biggest changes in the 2.0 release is the new Qt 3D Studio runtime which is built on top of the Qt 3D module. From user perspective this change is not directly visible, but a very important item under the hood. Using Qt 3D means deeper and easier integration to the Qt framework. It also makes it easier for us to introduce new features from both tooling and 3D engine perspective. First example of the new features is the Qt 3D Studio 2.0 Viewer Debugging and Profiling UI which shows the basic information about the rendering performance and structure of the 3D scene.

Qt 3D Studio Viewer Profile and Debug view

Qt 3D Studio Viewer Profile and Debug view

Deploying your UI project to the Viewer application in the target device with debugging and profiling enabled allows you to immediately see what the potential design performance bottlenecks are. You can also spot cases where you are using large textures or 3D models have a lot of parts which are not visible.

Improved Data Input

Data Inputs are a mechanism for integrating the user interface to the application logic. The Data Input functionality in the 1.1 release was somewhat limited and basically offered support only to control animation timelines and changing slides. With the 2.0 release we have introduced several new data types which can be now easily tied to different object properties in the 3D scene.

Improved Data Input

Improved Data Input

For more details on using Data Inputs please refer to documentation 

Editor Improvements

Biggest change in the editor side is the new timeline view which has been totally rewritten. This rewrite makes it easier for us to introduce new features in the future and already in the 2.0 release we have already made several small usability improvements.

New timeline

New timeline

We have also made changes to the shortcut keys and mouse usage so that changing between different Camera Views (Perspective, Top, Scene Camera etc.) and panning and orbiting is easier, and the behavior is closer to the common practices in 3D design tools. For more details please refer to keyboard shortcuts documentation.

Installation

Qt 3D Studio 2.0 beta releases are available through Qt online installer under the Preview section. Qt online installer can be obtained from Qt Download page and commercial license holders can find the packages from Qt Account.

Some example projects can be found under examples folder in the installation directory. Additional examples and demo applications can be found from https://git.qt.io/public-demos/qt3dstudio repository. If you encounter issues with using Qt 3D Studio or you would like to suggest new feature, please use Qt3D Studio project in the https://bugreports.qt.io

The post Qt 3D Studio 2.0 Beta Available appeared first on Qt Blog.

Get Started with Qt 3D Studio 2.0 beta 1

$
0
0

Now that the beta 1 release of Qt 3D Studio 2.0 is out, let’s go through the steps involved in trying it out for real.

Pre-built runtime binaries

As outlined in last year’s post, the runtime component of Qt 3D Studio has undergone significant changes. This means that the Viewer application that is launched whenever pressing the green “Play” button in Qt 3D Studio and, more importantly, the C++ and QML APIs with the engine underneath, have all been rewritten in the familiar Qt-style C++ on top of Qt 3D. In practice the runtime is an ordinary Qt module, providing both C++ libraries with classes like Q3DSWidget, Q3DSPresentation, etc. and a QML plugin Studio3D and friends.

The releasing of the pre-built binaries for the runtime has improved a lot for version 2.0: there is now a dedicated entry in the Qt installer which will install the necessarily files alongside the normal Qt installation, so pulling in the runtime via QT += 3dstudioruntime2 or by import QtStudio3D 2.0 in QML will work out of the box in a fresh Qt installation. No more manual building from sources is needed (except when targeting certain platforms).

Let’s Install

At the moment Qt 3D Studio binaries are provided for Windows and macOS. Linux may be added in future releases. It is worth noting that this does not mean the runtime is not suitable for running on Linux (or Android or QNX or INTEGRITY, for that matter) – it, like the most of Qt, will build (cross-compile even) and run just fine, assuming a well-working OpenGL implementation is available for your platform. (however, glitches can naturally be expected with less stable and complete graphics stacks) So while we expect the design work in the Qt 3D Studio application done on Windows or macOS for now, Qt applications using the created 3D presentations can be developed on and deployed to all the typical Qt target platforms.

When launching the online installer, take note of the following entries. Note that the layout and the location of these items may change in the installer in beta 2 and beyond. What is shown here is how things look as of 2.0 beta 1.

The runtime depends on Qt 5.11, meaning it must be installed together with 5.11.0 (or a future release, here we will use the release candidate).

In the example run shown on the screenshots we opted for Visual Studio 2015, but choosing something else is an option too – the installer takes care of downloading and installing the right set of pre-built binaries for the Qt 3D Studio runtime.

q3dsb1inst1

q3dsb1inst2

Once installation is finished, you will have the Qt 5.11 RC, a recent version of Qt Creator, Qt 3D Studio 2.0 beta 1, and the necessary runtime libraries all in place.

Let’s Design

Launching Qt 3D Studio and opening the example project from <installation root>\Tools\Qt3DStudio-2.0.0\examples\studio3d\SampleProject should result in something like the following.

q3dsb1screenshot

For details on what can be done in the designer application, check the documentation. Speaking of which, the documentation for Qt 3D Studio has been split into two parts in version 2.0: the runtime has its own documentation set with the API references, introduction, system requirements, and other topics. (the links are currently to doc-snapshots, the contents will move to doc.qt.io later on)

Let’s Code

Designing the presentation is only half of the story. Let’s get it into a Qt application.

Here we will code an example from scratch. Regardless, you may want to look at the runtime’s examples first. These ship in <installation root>examples\Qt-5.11.0\3dstudioruntime2.

q3dsb1screenshot2
The qmldatainput example in action

For now, let’s start with an empty project. Launch Qt Creator and create a new, empty Qt Quick project targeting Qt 5.11.

q3dsb1screenshot3

The application template gives us a main QML file like this:

q3dsb1screenshot4

When the runtime is installed correctly alongside Qt, we can add the following to make our Qt Quick application load up a Qt 3D Studio presentation and compose it with the rest of the Qt Quick scene.

    ...
    import QtStudio3D 2.0
    
    Window {
        ...
        Studio3D {
            anchors.fill: parent
            anchors.margins: 10
            Presentation {
                source: "file:///c:/QtTest/Tools/Qt3DStudio-2.0.0/examples/studio3d/SampleProject/SampleProject.uip"
            }
        }
    }

(replace c:\QtTest as appropriate)

In many real world applications it is quite likely that you will want to place the presentation’s files and assets into the Qt resource system instead, but the raw file references will do as a first step.

Launching this gives us quite impressive results already:

q3dsb1screenshot5

What we see there is the live Qt 3D Studio presentation rendered by the new Qt3D-based engine into an OpenGL texture which is then used by the Qt Quick scenegraph when drawing a textured quad for the Studio3D element. The keyframe-based animations should all run as defined in the Qt 3D Studio application during the design phase.

Now, a common misconception is that Qt 3D Studio is merely a designer tool and the scenes created by it are static with no runtime modifications possible when loaded up in Qt applications. This is pretty incorrect since applications have full control over

Future versions of Qt 3D Studio are expected to extend the capabilities further, for example with adding APIs to spawn and destroy objects in the scene dynamically.

Let’s change that somewhat annoying text in the middle of the scene, using a button from Qt Quick Controls 2. Whenever the button is clicked, the attribute corresponding to the text rendered by the Text node in the Qt 3D Studio scene will be changed.

Option 1: Direct Attribute Access

q3dsb1screenshot6

When digging down the scene structure at the left of the timline pane, take note of the fact that the Text node has a convenient, unique name already (DateAndTime). This is good since it means we can refer to it without further ado in the application code:

...
import QtQuick.Controls 2.2

Window {
    ...

    Studio3D {
        anchors.fill: parent
        anchors.margins: 10
        Presentation {
            id: pres
            source: "file:///c:/QtTest/Tools/Qt3DStudio-2.0.0/examples/studio3d/SampleProject/SampleProject.uip"
        }

        Button {
            text: "Change text"
            anchors.bottom: parent.bottom
            anchors.horizontalCenter: parent.horizontalCenter
            onClicked: pres.setAttribute("DateAndTime", "textstring", "Hello World")
        }
    }
}

For details on this approach, check out the documentation for Presentation and the attribute name table.

q3dsb1screenshot7
Clicking the button results in changing the ‘textstring’ property of the Text node in the Qt 3D Studio presentation. The change is then picked up by the Qt 3D Studio engine, leading to changing the rendered text.

Option 2: Data Input

While changing properties via setAttribute & co. is simple and effective, Qt 3D Studio also supports another approach: the so-called data inputs. With data inputs, the designers of the 3D scene decide which attributes are controllable by the applications and assign custom names to these. This way a well-known, fixed interface is provided from the designers to the application developers. The example presentation we are using here exposes the following data inputs. (and note the orange-ish highlight for Text String in the Inspector Control in the bottom right corner)

q3dsb1screenshot8

The name dateAndTime is associated with the textstring property of the DateAndTime Text node. Let’s control the value via this approach:

...
import QtQuick.Controls 2.2

Window {
    ...

    Studio3D {
        anchors.fill: parent
        anchors.margins: 10
        Presentation {
            id: pres
            source: "file:///c:/QtTest/Tools/Qt3DStudio-2.0.0/examples/studio3d/SampleProject/SampleProject.uip"

            property string text: ""
            DataInput {
                name: "dateAndTime"
                value: pres.text
            }
        }

        Button {
            text: "Change text"
            anchors.bottom: parent.bottom
            anchors.horizontalCenter: parent.horizontalCenter
            onClicked: pres.text = "Hello World"
        }
    }

Here the Text node starts up with a textstring value of “” (but note there is no actual reference to “textstring” anywhere in the application code), while clicking the button results in changing it to “Hello World”. What’s more, we can now use the usual QML property binding methods to control the value.

That is all for now. Expect more Qt 3D Studio related posts in the near future.

The post Get Started with Qt 3D Studio 2.0 beta 1 appeared first on Qt Blog.

Qt 3D Studio 2.0 released

$
0
0

We are happy to announce that the Qt 3D Studio 2.0 has been released. We are making this release together with our newest addition to the Qt design tool family: Qt Design Studio.

To get an overview of what is new in Qt 3D Studio 2.0, see live demos and ask questions, sign up to the upcoming webinar.   

Editor

From UI designer perspective the 2.0 release contains a lot of usability improvements. For example the 3D design view has now a gradient background which makes it easier to see the orientation of viewport. Camera and Light objects also have a better visualization which makes it easier to see the effects of the property changes for these objects. Also the 3D object manipulators have been improved so that rotating, scaling and moving accuracy is now much better. Also selecting and deselecting items is now more logical. Keyboard and mouse handling has been also changed so that you can for example now Pan, Zoom and Orbit with Alt key + mouse button combinations.

3D Desing View

3D Design View

Also the interaction between application logic and UI can be now fully defined by using the Data Inputs which we introduced as technology preview in 1.1 release. Mechanism for doing this has remained the same i.e. the Qt 3D Studio project defines what kind of data the UI needs and these data items can be added with Data Input dialog (under File menu).

Define and link data inputs to UI

Define and link data inputs to UI

The Data Inputs are then tied to different properties or timeline to control object property changes or animation timeline from the application logic.

Runtime

The 2.0 release introduces the new Qt 3D Studio runtime built on top of Qt 3D module. This means that the whole rendering engine has been rewritten with Qt and it now follows the normal Qt module practices. This is a big milestone from the further development perspective as with the new code base adding new features and maintenance is easier. To make sure that that we haven’t introduced regressions between the new and the old runtime we are still shipping the old runtime as part of the 2.0 release. You can enable the old runtime Viewer application from the Edit – Studio Preferences menu by enabling the Legacy Viewer option. After that you will get an additional Play button to the toolbar for launching the old Viewer. If you are experiencing differences between the runtimes please file a bugreport to https://bugreports.qt.io

Getting started

Qt 3D Studio 2.0 is available through Qt online installer under the Tools section. We also provide standalone offline installers which contain all you need to start designing Qt 3D Studio User Interfaces. Online installer also contains pre-build runtime for Qt 5.11 which is needed for developing Qt applications using Qt 3D Studio UI. Qt online installer and offline installers can be obtained from Qt Download page and commercial license holders can find the packages from Qt Account. Binary packages are are available for Windows and Mac. For further information about how to get started please refer to the Getting started documentation and Laszlo’s blog post Get Started with Qt 3D Studio 2.0 beta 1.

Some example projects can be found under examples folder in the installation directory. Additional examples and demo applications can be found from https://git.qt.io/public-demos/qt3dstudio repository. If you encounter issues with using Qt 3D Studio or you would like to suggest new feature, please use Qt3D Studio project in the https://bugreports.qt.io

Be sure to sign up to the webinar now and tune in to find out all about Qt 3D Studio 2.0. Watch some cool demos, and ask your questions live!

The post Qt 3D Studio 2.0 released appeared first on Qt Blog.

What’s in a Qt 3D Studio Scene?

$
0
0

Now that Qt 3D Studio 2.0 has been released, let’s look at what some of the new features enable. In particular, we will visit the so-called in-scene debug and profile views, as these handy, built-in (both to the viewer launched from the editor and, if the developer decides so, to applications) views allow answering questions like What happens between loading a scene and issuing OpenGL draw commands?, Is this 3D scene too heavy?, How much graphics resources does this scene use?, or Is there any chance this scene will perform on this or that embedded hardware?

Note that this post assumes a certain level of familiarity with the basic concepts of Qt 3D Studio. For an introduction, refer to the editor and runtime Getting Started pages of the documentation.

profui11

Firing up the viewer by clicking the green Play button in the toolbar of the Qt 3D Studio application launches q3dsviewer, which is a simple Qt application that uses the Qt 3D Studio Runtime to load and render the presentation into a QWindow. With 2.0 and its migration to a new engine that is using Qt 3D internally, the viewer now offers a menu item View/Profile and Debug (or just press F10). We will use the viewer in the following examples but it is worth remembering that all this is available to any application using the runtime.

profui12

First, we have some quite standard information up there: (note that everything is live and updated every frame)

  • OpenGL – useful on some platforms to verify the application is indeed running against the desired implementation, or to see if the runtime is using its OpenGL ES 2.0 level reduced functionality mode (see the System Requirements page in the documentation for more in this).
  • CPU and memory usage (available on Windows and Linux (incl. Android))
  • and of course, the frame rate (with a simple, configurable visualization even).

Given that this is built-in and is rendered in-scene (so works with platform plugins like eglfs as well), and so can be brought up on any embedded device, this view alone can be quite valuable during the development phase.

The rest is a bit more tricky since some of it may need some understanding of what happens under the hood. Some of you may remember a Qt World Summit talk from last year, discussing implementing a “runtime on top of Qt 3D”. This describes the concept well and is still valid today. In short, the Qt 3D Studio editor generates .uip (and .uia) files which are XML documents describing the scene and other things.

uip example

Excerpt from SampleProject’s .uip file

(click on the images for a full size view!)

Now, before anyone gets a shock from all that XML stuff, the good news it that this is basically irrelevant. The format may change arbitrarily in the future, and could be JSON, a binary blob, or QML even (hint hint…). It is just a serialization format in its current form. What matters is the scene (and slide) trees that are then created by the runtime when parsing this input. The concept is very similar to the scene graph of Qt Quick, where the QQuickItem tree is backed by a QSGNode tree. With Qt 3D Studio the QQuickItem tree has no equivalent (yet! (hint hint…)) and we are building up a Q3DSGraphObject tree either by parsing the XML document or programatically with a (currently private) C++ API.

SampleProject scene structure

SampleProject scene structure

The (experimental) console’s scenegraph command shows this very well. Bringing up the console from the Scene Info section and typing scenegraph prints the Q3DSGraphObject tree. Unsurprisingly, this matches almost completely the scene tree in the editor’s Timeline view.

Note that at this point we still have nothing to do with actual graphics resources, APIs like OpenGL, or drawing anything on screen. We could just have stopped here, manipulate our Q3DSGraphObject tree a bit, and then maybe serialize it back to a file, without ever initializing anything graphics related. Graphics only comes in the picture in the next step:

Qt 3D entity graph

The generated Qt 3D entity graph(the Qt 3D entity graph viewer is not available in 2.0 but is already merged to the master branch and will therefore be place in 2.1 later this year)

For those who have experience with Qt 3D this probably is starting to look familiar.

Based on the Q3DSGraphObject tree, a Qt 3D framegraph and scene (entity) graph are generated and kept up-to-date in sync with any changes to the Qt 3D Studio data structures. It is then up to the Qt 3D renderer to manage graphics resources (textures, buffers) and generate draw calls based on the entity and framegraphs.

Model nodes become entities with one or more child entities (one for each sub-mesh) which have components like a material and a Q3DSMesh (a QGeometryRenderer subclass) on them, thus turning them into renderable entities. Each of these will lead to eventually issuing an OpenGL draw call (glDrawElements or similar).

The QLayer components show how the “tagging” to differentiate between the opaque and transparent (and sometimes other) passes is done in practice: the renderable entities (the ones with Q3DSMesh on them) only have one QLayer component associated since they belong either to the opaque or the transparent pass, but not both. The ancestors, like the parent “model” entity, or entities corresponding to group nodes have 2 QLayers since these are non-renderable (no draw call is generated for them) and their transform has to be taken into account in all passes.

Text is (for now) done by rendering into a QImage with the raster paint engine (QPainter) and then drawing a textured quad, as witnessed by the single entity generated for the DateAndTime text node.

This in itself does not tell much about the number or size of graphics resources. To help designers and developers getting an overview of the approximate graphics resource usage, the Qt 3D Studio runtime tracks some of the relevant Qt 3D objects it creates, in particular texture and buffer instances which under the hood lead to create OpenGL texture and buffer objects. This is what is shown in the Qt 3D Objects view:

Qt 3D object list

Qt 3D object list

  • Is the model the designer provided too complex? Seeing a lot of submeshes with lots of data in them should raise a flag right away. Such meshes may render just fine on a desktop PC but can cause performance issues on an embedded device.
  • Are we wasting time on unnecessary blending? Blending means the object belongs to the transparent pass and so the mesh is rendered with together with the other “transparent” meshes with blending enabled, sorted back-to-front. This is unnecessary and wasteful if there is in fact no need for full or partial transparency.
  • Are the texture maps too large? A quick look at the texture list can reveal another set of potential problems that may pop up when deploying to a more constrained target platform.
  • Is multisample antialiasing in use? MSAA may make things look nice on the design PC but may be too much to ask from some of the typical embedded devices today.

Pay attention to the Shares data column. Two rows in the texture list does not mean there are two OpenGL textures active. For example, using the same file as the source of more than one texture map will often lead to reusing the same data and ending up with using the exact same OpenGL texture object under the hood.

Now that we have the data to render with (geometry, shaders, textures), what is left is to define how exactly the rendering is to be done. This is ensured by generating and maintaining a Qt 3D framegraph:

SampleProject Qt 3D framegraph

SampleProject Qt 3D framegraph

This framegraph view is likely not that essential for typical users. It is most useful to those who are looking for deeper understanding and to develop the runtime.

Note that Layer Caching option in the Alter Scene section on the left. (do not confuse Qt 3D Studio layers with Qt 3D QLayers: in Qt 3D Studio a scene consist of one or more layers, each of which acts as a mini-scene with its own 2D backing store (OpenGL texture in practice), which are then composed together with a simple (or sometimes not so simple) texture blit as the last step in the rendering process – this is no different than Qt Quick layers in fact. Qt3D’s QLayer has nothing to do with this and can rather be thought of as a tag that can be attached to entities to allow filtering them.)

When there is no change in a layer (nothing is animated), there is no need to re-render the contents of it for the next frame, the existing texture contents can be used for composition as-is. This is implemented by dynamically taking out/re-adding framegraph node subtrees from/to the framegraph. This is also reflected by the live framegraph view, so to get a full overview of what the rendering of the scene involves, turn Layer Caching off temporarily.

One may wonder why there are seemingly useless QFrameGraphNode objects with a sole QNoDraw child in the tree. The reason is that subtrees may be generated inserted dynamically upon certain conditions (say a light becomes shadow casting, SSAO gets enabled, progressive AA gets enabled for a layer, etc.), and these “dummy” nodes with their no-op child leaf are placeholders.

Enough of tree views, back to the simpler tables:

SampleProject layer list

SampleProject layer list

The Layer list shows all the Qt 3D Studio layers. Each of these has one or more corresponding textures in the Qt 3D Objects view. Watch out for things like:

  • Are the antialiasing settings sane? See this documentation page for an overview of the available AA techniques. All of them come at a cost when it comes to performance and resource usage.
  • Are the Dirty and Cached values as expected? Layers that have no animations running in them are expected to be in Dirty == false and Cached == true state (thus avoiding re-rendering the contents every frame).
  • If an advanced blend mode (overlay, color burn, color dodge) is used, make sure it is really required as these involve additional resources and expensive extra blits.

Note the Presentation combo box that is present in this and many other views. Qt 3D Studio allows using multiple sub-presentations, as explained here. The contents of sub-presentations are rendered into textures which are then used either as the contents of some layer in the main presentation, or as texture maps for some material. As the main and the sub-presentations each have their own Q3DSGraphObject tree, most related functionality in the console and in the debug views is organized on a per-presentation basis. Use the combo box or the appropriate console command to switch between the presentations.

Finally, note that there is extensive qDebug output from the runtime. The debug messages are also collected and shown in the Log view. This allows easy filtering, allowing turning off uninteresting messages. The most interesting categories are q3ds.perf, q3ds.scene, and q3ds.uip.

q3ds.perf log messages

q3ds.perf log messages

Certain operations that are considered especially heavy will trigger a q3ds.perf message. This can be helpful to recognize some less optimal design choices in the presentations.

The post What’s in a Qt 3D Studio Scene? appeared first on Qt Blog.

Qt 3D Studio 2.1 Beta 1 released

$
0
0

We are happy to announce the release of Qt 3D Studio 2.1 Beta 1. It is available via the online installer. Here’s a quick summary of the new features and functions in 2.1.

For detailed information about the Qt 3D Studio, visit the online documentation page.

Data Input

For data inputs, we are introducing a new data type; Boolean. Related to this, elements now have a Visible property which can be controlled with the Boolean data input. When item visibility is controlled by a data input, the eyeball icon in the timeline palette changes to orange to illustrate this.

data-input

Data inputs are now checked at presentation opening. If elements in the presentation are using data inputs that are not found from the data input list (in the .uia file), a warning dialogue is shown. Then, the user can choose to automatically remove all property controls that are using invalid data inputs.

Additionally, the visualization of data input control for slides and the timeline has improved. Now it is much clearer which data input is in control.

data-input-2

For more details on data inputs, see documentation.

New Project Structure

There is a new project structure with presentations and qml streams folders. Presentation (.uip) files are now visible in the project palette, it is also possible to have several .uip files in a project.

project-palette

In the project palette, it is now possible to double-click an asset to open it in the application associated by the operating system. .uip files will open in Qt 3D Studio.

Sub-Presentations

A lot of improvement has been done to make working with sub-presentations more convenient. Some of the key improvements are:

  • You can create a new presentation in the Studio without leaving your current project.
  • With the possibility to have many .uip files in one project, it is easy to share assets between presentations.
  • Importing both .uip and .qml presentations are done the same way you import other assets.
  • Assign sub-presentations to meshes or layers by dragging and dropping from the project palette.

For more details on sub-presentations, see documentation.

Installation

As mentioned, Qt 3D Studio 2.1 Beta 1 is available via the Qt online installer. You’ll find it in under the preview section. If you have a previous installation, please use the Update feature in the Qt Maintenance tool to get the latest version. 2.1 version will be installed alongside the old version. The Qt online installer can be downloaded from www.qt.io/download while commercial license holders can find the packages from account.qt.io.

The post Qt 3D Studio 2.1 Beta 1 released appeared first on Qt Blog.

Qt 3D Studio 2.1 Released

$
0
0

We are happy to announce that Qt 3D Studio 2.1 has been released. Qt 3D Studio is a design tool for creating 3D user interfaces and adding 3D content into Qt based applications.  With Qt 3D Studio you can easily define the 3D content look & feel, animations and user interface states. Please refer to earlier blog posts  and documentation for more details on Qt 3D Studio.

Editor

Sub-Presentations is a feature which allows embedding an another Studio presentation or a QML file in a Studio presentation. This enables for example dividing the design work into smaller projects and making re-usable components. Managing the Sub-Presentations and adding them into views is now easier with the 2.1 release. Project browser shows all the Qt Quick files (.qml) and Qt 3D Studio presentations (.uip) imported to the main project and then those can be easily added to a scene layer or a texture to a an object by dragging from the project browser to the scene. Please refer to the documentation for more details. Sub-Presentations are also now visible in the scene view so that you can see the whole user interface when creating the design.

Qt 3D Studio 2.1 release also contains a new option for Scene preview when you are working with different camera views (perspective, top etc.) which super handy when aligning objects in the scene.

Scene Preview in Perspective View

Scene Preview in Perspective View


Runtime

On the runtime side the main focus has been on performance and stability improvements. We have also been writing a new API that enables replacing the old runtime in the Qt 3D Studio Editor. In the future the new API will also enables dynamic content creation from the application side. Stay tuned.

Profiling view has gained some additional data and the possibility for e.g. changing the data input values.

Profiling UI

Qt 3D Studio Viewer Profiling UI

As you may know we introduced support for compressed textures in Qt Quick applications in Qt 5.11 and we are happy to announce that this support has been also added to the Qt 3D Studio runtime. So if you are targeting to a device that supports  ETC2 or ASTC Compressed textures you can improve the loading time and save memory by compressing the textures. Of course this is just the first step and we are introducing the asset compression management in the Editor side in the future versions of Qt 3D Studio.

Getting started

Qt 3D Studio 2.1 is available through Qt online installer under the Tools section. We also provide standalone offline installers which contain all you need to start designing Qt 3D Studio User Interfaces. Online installer also contains pre-build runtime for Qt 5.11 which is needed for developing Qt applications using Qt 3D Studio UI. Qt online installer and offline installers can be obtained from Qt Download page and commercial license holders can find the packages from Qt Account. Binary packages are are available for Windows and Mac. Instructions for building the editor & runtime to Linux please refer to the README file. Please also note that Qt 3D Studio runtime uses Qt 3D module for rendering which means that Qt 3D Studio 2.1 requires Qt 5.11.2.

Some example projects can be found under examples folder in the installation directory. Additional examples and demo applications can be found from https://git.qt.io/public-demos/qt3dstudio repository. If you encounter issues with using Qt 3D Studio or you would like to suggest new feature, please use Qt3D Studio project in the https://bugreports.qt.io


The post Qt 3D Studio 2.1 Released appeared first on Qt Blog.

Qt 3D Studio 2.2 Released

$
0
0

We are happy to announce that Qt 3D Studio 2.2 has been released. Qt 3D Studio is a design tool for creating 3D user interfaces and adding 3D content into Qt based applications.  With Qt 3D Studio you can easily define the 3D content look & feel, animations and user interface states. Please refer to earlier blog posts and documentation for more details on Qt 3D Studio.

New material system

One of the great new features in the Qt 3D Studio 2.2 release is the redesigned Material system. Applying material changes to several objects that share the same material can be now done by simply applying the changes to a single material.

New material system

Materials are now part of the Project View

The way that materials are applied when importing 3D models has been greatly improved. Materials are now part of the Project assets tree view and stored as a separate material definition files as part of the project file structure. This enables also sharing materials between projects. For details please refer to the Materials and Shaders documentation for details how to create and manage materials.

Scene View

Creating pixel perfect UI of course requires attention to detail and a lot of pixel peeping. The 2.2 release introduces a zoomable view for Scene Camera.

Scene Camera View

Scene Camera View

All Qt 3D Studio views are dockable so you can place the Scene view anywhere in the view layout or undock the view to a separate window.

Sub-Presentation Handling

We have done also great improvements to the Sub-Presentation management. Sub-Presentations are now part of the Project View which makes it easier to switch between sub-presentations and add sub-presentation content to the main presentation. Please refer to the documentation for details how to use Sub-Presentations in your project.

Compressed Textures

In Qt 3D Studio 2.1 runtime we introduced the compressed texture support in the runtime and now we have added an option to enable the compressed textures in the Editor Presentation settings. Doing the actual compression requires external tools (such as ETCPACK). In the future versions of Qt 3D Studio, we are introducing more integrated workflow for managing and optimizing the project assets.

Stereoscopic rendering (Technology Preview)

We are also excited to introduce Stereoscopic rendering as a new feature to the Qt 3D Studio runtime. Feature can be tested with the Viewer by enabling the Stereo Mode from the View menu.

Strereoscopic rendering

Enabling stereoscopic mode in the Viewer

Supported stereo modes are: Top-Bottom, Left-Right and Anaglyph rendering. Also eye separation can be increased/decreased from the menu. We will be introducing the QML API for controlling the stereo mode properties in the future releases.

Performance optimization for the runtime

We have been working hard to squeeze our more rendering performance from all kinds of embedded devices and the first set of changes are included in the 2.2 release. We consider these changes to be still experimental and for that reason the new rendering pipeline needs to be explicitly enabled when running the Qt 3D Studio based application. You can test the new rendering by setting Q3DS_DRAGON environment variable to 1. We will be getting more into details on what kind of performance improvements we have been seeing in our tests in a separate blog post. Stay tuned.

View3D QML element

In the QML API we have introduce a new View3D items which can be used to display the contents of a single Qt 3D Studio layer in a Qt Quick scene. This allows placing 3D objects in several places in Qt Quick Scene instead of one rectangular 3D view area. You can also do the Scene composition in the Qt Quick side.

Getting started

Qt 3D Studio 2.2 is available through Qt online installer under the Tools section. We also provide standalone offline installers which contain all you need to start designing Qt 3D Studio User Interfaces. Online installer also contains pre-build runtime for Qt 5.12 which is needed for developing Qt applications using Qt 3D Studio UI. Qt online installer and offline installers can be obtained from Qt Download page and commercial license holders can find the packages from Qt Account. Binary packages are available for Windows and Mac. For the first time we are also providing technology preview binary packages for Linux.

Instructions for building the editor & runtime please refer to the README file. If you are targeting for embedded systems with running e.g. RTOS you need to build the Qt 3D Studio runtime component for the target operating system. Qt 3D Studio runtime can be found from the git repository. If you are Qt for Device Creation Boot2Qt images the Qt 3D Studio Runtime and Viewer are included in the images. Please also note that Qt 3D Studio runtime uses Qt 3D module for rendering which means that Qt 3D Studio 2.2 requires Qt 5.12.

Some example projects can be found under examples folder in the installation directory. Additional examples and demo applications can be found from https://git.qt.io/public-demos/qt3dstudio repository. If you encounter issues with using Qt 3D Studio or you would like to suggest new feature, please use Qt3D Studio project in the https://bugreports.qt.io


The post Qt 3D Studio 2.2 Released appeared first on Qt Blog.


Qt 3D Studio Performance Improvements

$
0
0

Good performance of 3D applications is essential for achieving the desired user experience. While the 3D assets are the most important items affecting the performance, the 3D engine itself needs to be highly efficient in what it does. We have been looking into ways for improving the performance of Qt 3D Studio and especially on how to reduce the CPU load and RAM consumption of 3D applications.

We released Qt 3D Studio 2.2 last week with a lot of cool features, explained in the release blog post. With this blog, the focus is on a couple of items provided by Qt 3D Studio 2.2 that significantly improve the performance and memory consumption. First, we’ll look into leveraging texture compression to reduce RAM consumption and to improve the startup time. Later in the blog post, we’ll dig into the new, still experimental, renderer provided by Qt 3D Studio 2.2. The new renderer, as well as the upcoming new animation system, is specifically developed to reduce the CPU load of Qt 3D Studio applications.

Using Texture Compression for 3D Assets

Qt 3D Studio 2.2 provides support for KTX texture format, enabling the use of various different compression algorithms, such as ETC and ASTC compression. Texture compression helps a lot in reducing memory consumption as well as application startup time. ASTC is a compression technique specified by the Khronos Group and stands for Adaptable Scalable Texture Compression. The ASTC compressed textures are then packaged into a KTX container (another Khronos Group standard, also used by Qt Quick) and used by the Qt 3D Studio. Use of compressed textures is enabled from the Qt 3D Studio Editor (see documentation). Currently, the compressed textures need to be created separately.

The graph below visualizes the impact of compressed textures for the RAM consumption.

qt3d_studio_ram

The impact depends on the application. In these measurements, we have three different 3D usage scenarios, called Scene 1, Scene 2 and Scene 3. These are benchmark applications created specifically for testing purposes. They run continuously as part of our performance testing system to detect possible regressions (and improvements as well, of course). The impact of texture compression on a real-life Qt 3D Studio application depends upon the application, but the test applications (scenes) give a good impression on how applications of varying complexity can benefit from texture compression.

With ASTC texture compression (we have set it with 4×4 block size and linear rgb format) the memory consumption is reduced by 23MB (20%)  in the simplest Scene 1 test case, by 41 MB (28%) in the Scene 2 and by 56 MB (25%)  in the Scene 3 test (the most complex one of the three). On average, the tests using texture compression yield a 24% reduction in RAM consumption, which is quite a nice saving of that scarce RAM.

The graph below visualizes the impact of compressed textures for the startup time of the application.

qt3d_studio_startup

The startup time improvement with texture compression is 57% (from 0,23 to 0,1 s) for Scene 1, 64% (from 0,55 to 0,2 s) for Scene 2 and 65% (from 0,85 to 0,3 s) for Scene 3. The time is measured from starting to load the presentation until the first frame is shown. On average, the startup time is reduced by 62%, so it really pays off to use compressed textures.

Note that all these can be directly achieved using the latest Qt 3D Studio 2.2 release and using the supported texture compression for the graphics assets.

Dragon – the New Renderer and Animation System for Qt 3D Studio

The default renderer and animation system of Qt 3D Studio 2.2 are still based on the same version as before. But behind the scenes we are also working on a new renderer and animation system codenamed “Dragon”, bringing performance improvements to the Qt 3D Studio Runtime. These are still experimental with Qt 3D Studio 2.2, but can be enabled to achieve some improvements. The intention is to make the “Dragon” renderer and animation system the default choice with the Qt 3D Studio 2.3 release (scheduled for March 2019).

To see the impact of the new renderer and the animation system on the CPU usage, we tested it on NVIDIA Jetson TX2 (64bit ARM embedded processor) and Intel i7-6700 equipped with NVIDIA Quadro P2000 graphics (i.e. a regular desktop PC), both running Linux as the operating system. Same test scenes as with the texture compression benchmark were used, but with no compression applied (as the texture compression is handled with the GPU, it’s not so relevant for the CPU benchmarking).

This time we compared the default Qt 3D Studio 2.2 with the Qt 3D Studio 2.2 running the new Dragon renderer (experimental with the 2.2 version) and the new animation system coming with Qt 3D Studio 2.3.

qt3dstudio_cpu_tx2

The CPU load is reduced on average by 45% with the NVIDIA TX2. The reduction varies a bit between the scenes, but is roughly on the same level (38-49% improvements in the different test cases).

qt3dstudio_cpu_i7

Running the same comparison on an Intel i7 desktop PC, the CPU load reduction is 63% on average (59-67% improvements in the different test cases).

As seen from the results, the new Dragon renderer provides important optimization for the CPU utilization. The new renderer improves the CPU usage especially in scenes where there are many objects, but only a few of them animated between frames. It detects changes in different objects and ensures that interdependent jobs only process necessary intermediate values. The new renderer alone will not improve scenes where all objects are continuously animated, but it can significantly cut down the CPU usage in certain scenes.

The animation system has also been overhauled to minimize the processing performed for animated values. Previously, animations would be offloaded to a backend job, but this turned out to degrade performance due to additional copying and processing in the offloading step. By coupling the animation system more tightly to the renderer, we have managed to bring down the CPU usage in highly animated scenes as well. The tighter coupling has also made the data flow simpler, which makes the code easier to reason about and maintain.

To enable the new Dragon renderer set the Q3DS_DRAGON environment variable to 1 using the new Qt 3D Studio 2.2 release. The animation system is part of Qt 3D Studio 2.3 release, so to try that one out, use the master branch and enable the animation system by setting the environment variable DRAGONWINGS to 1. The animation system feature is already merged and will be part of the Qt 3D Studio 2.3 release in March 2019.

Getting started with Qt 3D Studio 2.2

The easiest way to get Qt 3D Studio 2.2 is through the Qt online installer. The Qt online installer and offline installers can be obtained from the Qt Download page and commercial license holders can find the packages via their Qt Account. Binary packages are available for Windows, Mac and Linux. If you are using Qt for Device Creation 5.12 images the Qt 3D Studio 2.2 Runtime and Viewer are already included in the images. Please also note that Qt 3D Studio runtime uses Qt 3D module for rendering which means that Qt 3D Studio 2.2 requires Qt 5.12 LTS.

The post Qt 3D Studio Performance Improvements appeared first on Qt Blog.

Qt 3D Studio 2.3 Released

$
0
0

We are happy to announce the Qt 3D Studio 2.3 release is now available via the online and offline installers. Here’s a quick summary of the new features and functions in 2.3. For detailed information about the Qt 3D Studio, visit the online documentation page.

Font Rendering

The 2.3 release introduces a new font rendering engine based on distance field font rendering. The new renderer is the default starting from 2.3 release onward. The old Qt Painter texture based can be enabled by setting an environment variable Q3DS_DISTANCE_FIELD_DISABLED to 1. The new font rendering also supports pre-generated distance field cache. The new font rendering does require Qt 5.12.2 release, with the earlier Qt releases the text rendering in using the old font rendering.

We have also added additional text properties e.g. fixed size text elements, text eliding and word wrapping options.

Variant tags

2.3 release also introduces Variant Tags  feature which enables to exclude parts of a presentation project during loading. This is to avoid parsing and loading objects that are not needed in the presentation for certain variants, saving on loading time and resource usage.

Variant Tags

Using Variant Tags

This enables creating multiple variations of a product UI with one single Qt 3D Studio presentation. One concrete use case is the need to have UI variants for different geographical areas or enabling or disabling some parts of the user interface based on a hardware model information. Please see more details on the variant tags documentation how to add variants into design.

Performance improvements

As mentioned earlier in the performance improvement blog post we have been working on several performance related topics. In addition to the texture compression introduced in 2.2 release we have now enabled the new animation system by default. If you wan’t to switch between the old animation system it can be enabled by setting the Q3DS_NO_DRAGONWINGS environment variable to 1. We have also working with the new experimental renderer which can be enabled by setting the Q3DS_DRAGON environment variable to 1.

Other improvements

We have been making several improvements to the 3D asset importing functionality. For example lights and camera objects are now imported from COLLADA and FBX files. There are also several improvements to compatibility with Maya FBX exports.

We have also added a QML API for controlling the Stereoscopic rendering properties from the application.

Getting started

Qt 3D Studio 2.3 is available through Qt online installer under the Developer and Designer Tools section. We also provide standalone offline installers which contain all you need to start designing Qt 3D Studio User Interfaces. Online installer also contains pre-build runtime for Qt 5.12 which is needed for developing Qt applications using Qt 3D Studio UI. Qt online installer and offline installers can be obtained from Qt Download page and commercial license holders can find the packages from Qt Account. Binary packages are available for Windows, Mac and Linux.

If you are targeting for embedded systems with running e.g. RTOS you need to build the Qt 3D Studio runtime component for the target operating system. Qt 3D Studio runtime can be found from the git repository.

The post Qt 3D Studio 2.3 Released appeared first on Qt Blog.

Optimizing Real-Time 3D for Entry Level Hardware

$
0
0

When more and more cars are being equipped with digital instrument clusters, it is very important to consider the cost of the electronics needed to achieve the desired user experience. In volume products, it matters a lot whether the cost of a hardware component is 10, 50 or 100 USD – so it really pays off to consider what is the most efficient approach for software running in the SoC. Today users expect high-quality graphics and smooth animations, and in a system like a digital instrument cluster, it is also a matter of safety to make sure performance is constantly high. In this post, we will explain how we reached a silky smooth and constant 60 fps rendering performance with Renesas R-Car D3 entry-level SoC using Qt Quick and Qt 3D Studio.

Requirements for the project

We selected the Renesas R-Car D3 low-end SoC as the hardware for this project. Similar performance entry level SoCs are available from other manufacturers as well, and we have also completed projects in the past with NXP’s entry-level SoCs. Now we wanted to use the Renesas R-Car D3, which comes with the Imagination PowerVR GE8300 entry level GPU (https://www.imgtec.com/powervr-gpu/ge8300/) and one ARM Cortex A53 CPU core.

Our visual designers created a rather typical modern digital instrument cluster design as the basis of this work. The cluster UI has two different gauge modes and a real-time 3D ADAS (Advanced Driver Assistance Systems) view in the middle. The target was to achieve a solid 60 FPS at 1280 x 480 resolution on the selected low-end hardware (Renesas R-Car D3 entry-level SoC). The design concept contained both real-time 3D elements (ADAS view) as well as elements that can be rendered with 2D using OpenGL shaders and visual design bringing a seamless 3D experience (without actually being calculated as real-time 3D).

demolayout

The structure of the design concept

Initial setup and findings

After completing the initial prototype using Qt 3D Studio we deployed it to the R-Car D3 development board running Qt 5.12 to analyze performance. Even though the graphics were not very complex, this non-optimized design was only rendering a mere ~10 fps. After we optimized the project assets it improved the situation, but at ~20 fps we were still quite far from the target rendering 60fps. It was clear, we will have to do further analysis and consider the overall architecture of the application.

The analysis was started with PVRTrace to learn more from the D3 SoC and where the pain points are. Very soon we learned that usage of large FBO’s (Frame Buffer Objects) or rendering target buffers in OpenGL basically kill the performance on this hardware. We measured 10ms overhead from using even just a single fullscreen FBO, which was 10ms out of the 16.6 we had available for the targeted 60fps.

Measured architectures

We measured variety of different application architectures and to get a baseline what can be reached with D3 hardware we also measured Qt Quick + plain OpenGL ADAS view. We implemented everything possible with Qt Quick and drew ADAS with pure OpenGL commands. With this setup we reached 60fps, which confirmed that are target is attainable.

We then moved on to the Qt Quick + Qt 3D Studio setup. The gauges were implemented with Qt Quick and the ADAS view in the middle as a Qt 3D Studio component. This method uses 1 FBO. A single layer was used for 3D content (single layer pass through), therefore no second FBO is used. Further savings on RAM can be achieved using texture compression. This setup was able to render static 60fps as well.

The most optimal architecture

After trying different approaches it was obvious that we will achieve the best possible performance when implementing the 2D elements with Qt Quick and use Qt 3D Studio runtime for the ADAS view. By implementing a background drawing patch to the runtime, we were able to squeeze out a few more frames per second and lower the CPU consumption.

demolayout2

Gauges implemented with QtQuick and 3D ADAS view with Qt 3D Studio 

Normally when you want to combine a 3D scene created with 3D Studio with 2D content with Qt Quick, it is necessary to composite the two together.  In this case Qt Quick has the responsibility for composition, however since Qt Quick is a 2D renderer it is necessary to flatten any 3D content embedded in the scene.  This is by default done by rendering the 3D content to an off-screen texture first, but as we mentioned above, the target hardware comes with a huge performance penalty for rendering to off-screen surfaces.  So this default route needed to be avoided.  Fortunately, Qt Quick is quite flexible and allows for some workarounds.

Our workaround was to render the Qt 3D Studio scene directly to the window at the start of the frame and then render the Qt Quick User interface over it.  The element in the Qt Quick UI where the 3D scene would have in this case been just a transparent hole so that you can see the underlying 3D content that was already rendered to the screen.  When doing this it’s also important to remember not to clear the window when rendering, which can be done by setting the Window color to “transparent” in QML.

This approach does come with some design limitations, though. In this case the limitation was not a problem and the design concept was possible to implement without any changes.  You can choose to either render the 3D content before, or after you render the Qt Quick UI, meaning the content will always either be above or below.  Since we chose to draw before and thus below the the Qt Quick UI it is then possible for us to draw controls on top of the 3D UI (even though we don’t in our case), but we would have not been able to blend any content that was under the 3D view.

If we needed to blend the 3D view with some 2D content that was under the 3D view, we could have chosen to render after the 2D content was rendered, thus above.  What is not possible with the chosen approach though is composing content below and above of the 3D content at the same time.  That is only possible via the use of an off-screen texture, so keep that in mind when designing content for such targets. It is also worth considering that blending has high resource utilization, especially on low-end hardware where your resources are limited, so although we did not have this constraint for this particular project it’s worth considering whether blending is needed early on in the design phase.

Final design optimisations to the 3D parts

As always with real-time 3D applications, we also looked into optimizing the graphics assets. Very often the 3D models and other assets first received from the designer are not yet optimized for the target application and hardware environment. For example, the models may have a higher level of detail than the human eye can detect from the screen. When every GPU and CPU cycle counts, it is essential to optimize the graphics assets as well. With the right tricks, the system load can be significantly reduced without any visible difference for the user.

Road mesh optimizations

We created a road mesh that uses vertex colors multiplied by road texture. This way the road can blend to the black background without rendering transparency, or using another texture to create an overlay gradient.

demovertexcolors

Vertex colors are multiplied by road texture

We created the road movement by animating the models’ texture coordinates. (Animatable material)

demoroad

Animated road

For low cost “Anti-aliasing effect” the edges of road texture were painted with background color (black).

demoantialias

Antialiasing effect

Car mesh optimizations

First step for optimizing a high polygon car model with multiple textures and materials was to create a low poly version. A few low poly models were generated with different poly counts in Zbrush and those low poly models were tested in application to see what is the minimum poly count that still looks good. The final low poly car model was created with Autodesk Maya’s Quad Draw tool.

demolowpoly

High polygon car model to low polygon

The final car mesh had multiple materials with detailed textures which were baked into single texture map, deleting half of the car and three of the wheels. The UV texture layout was created for the left side of the car and one of the wheels and the textures were baked based on the high poly model. After this, the geometry was duplicated and mirrored to create the right side of the car, where the wheels were also copied. This way our model had 50 % more pixels on the geometry while maintaining the same texture size.

democar

Creating the texture map

The maximum size of the car on screen is 200*150 pixels, so we reduced the size of the texture to 256*256 pixels.

demotexture

Reducing texture size. The size of the pixels on the car’s surface A are similar to the pixel size in the actual render of B. and the final size C still preserves enough details.

2D component optimizations

We built the 2D UI from reusable textures to reduce memory usage and startup time. In this case we loaded ~15 000 pixels into memory, and used those to render ~200 000 pixels to screen. By using this approach, we basically only load 7.5% of the used assets, because of the re-usage.

demotopbar

Reusing 2D elements 

Optimized Proof of Concept Application

You can download application source codes and assets from https://git.qt.io/public-demos/qt3dstudio/

And here is a video showing the application running on Renesas R-Car D3


Summary

Getting the desired visual concept running constant 60 fps with real-time 3D content can be a challenge, but Qt provides a great framework and tools to achieve amazing performance even on a low-end hardware. To achieve maximal performance it is important to consider and identify which components that must be in real-time 3D and the components that can be done with 2,5D (visually looking 3D, but not rendered spatially). This helps to achieve a computationally optimal architecture, and it is a pre-requisite for getting the maximal performance. All the graphical assets should be optimized carefully, especially the 3D models and textures, which can easily become too complex, considering what is possible to detect with a human eye. When using OpenGL shaders, it is important to make sure these are suitable and optimized for the target hardware. With the architecture and assets in shape, the remaining work is to use sound Qt programming techniques – and to regularly use profiling tools to identify and analyze where the possible performance glitches may be coming from.

If you are planning or working on a project where high-performance graphics on lower-end hardware are requirements, we can help. Contact us for more information about our professional services.

The post Optimizing Real-Time 3D for Entry Level Hardware appeared first on Qt Blog.